
Moving out can stress house owners and parents. They fear losing their security deposit if the rental does not look clean. These Tips To Move Out Cleaning give clear steps to avoid that. 2
One Reddit user asked for a move-out cleaning checklist for a two-bedroom, two-bath apartment after three years. The unit had worn caulking, peeling vinyl floors, and a badly installed carpet.
The guide covers kitchen cleaning, bathroom cleaning, carpet cleaning, and dusting high-traffic areas. It lists cleaning products, a move-out cleaning checklist, and tools like a HEPA vacuum cleaner and microfiber cloths.
It also tells renters to check the lease agreement, take dated photographs, and book professional cleaning services early. 1 Keep reading. 3
Key Takeaways
- Creating a detailed move-out cleaning checklist, like the examples from Reddit threads and military housing lists, helps renters cover all key areas and meet standards for deposit return.
- Start planning at least one month before your move. Break big jobs into daily or weekly tasks to reduce stress.
- Focus on kitchens and bathrooms first. Use proper tools such as HEPA vacuums, microfiber cloths, vinegar-baking soda paste for ovens, and strong cleaners like Clorox or Barkeepers Friend to remove grime and stains.
- Patch holes in walls after removing nails or screws. Clean walls, doors, baseboards with mild cleaner or magic eraser to avoid repair fees.
- Take date-stamped photos of your cleaned apartment before moving out. Book professional services if needed (like Cleaning Glow San Francisco) early for best results and proof during landlord inspections.
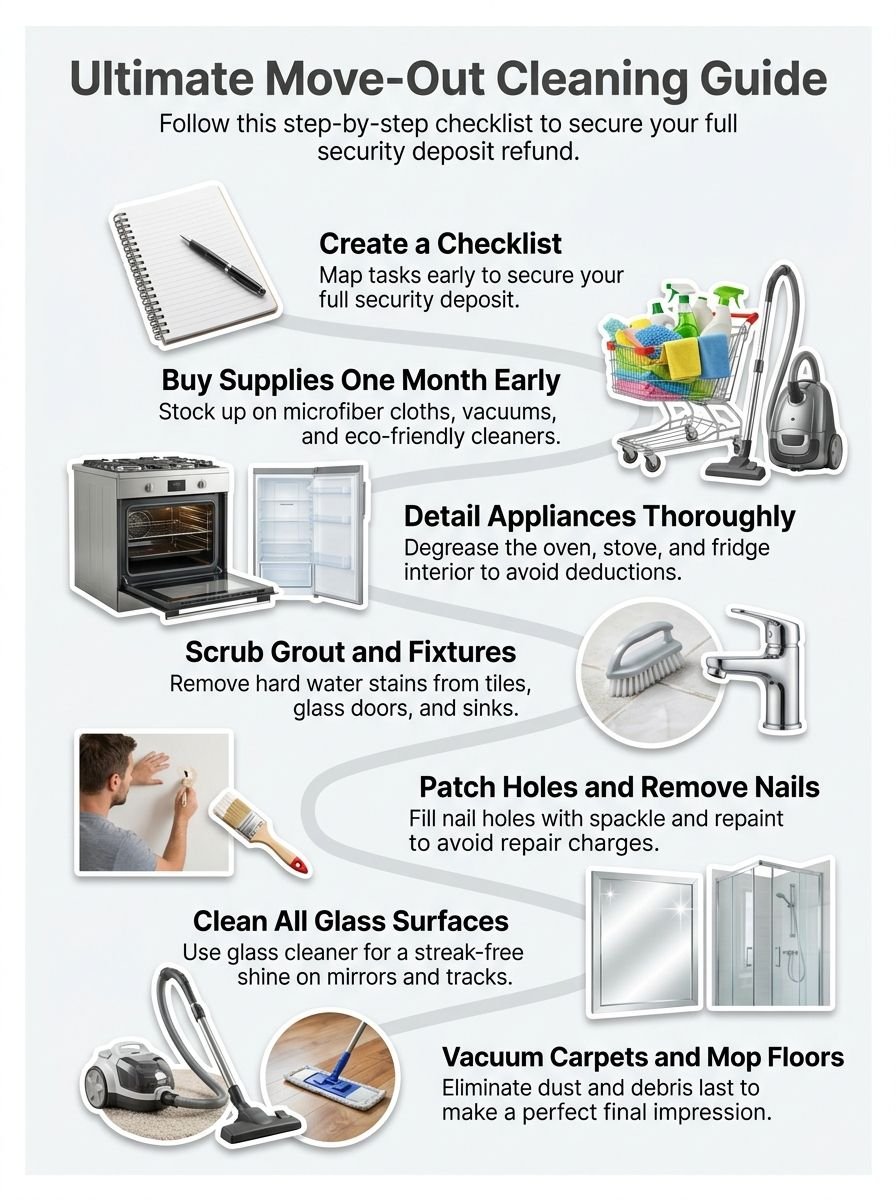
Plan Your Move-Out Cleaning
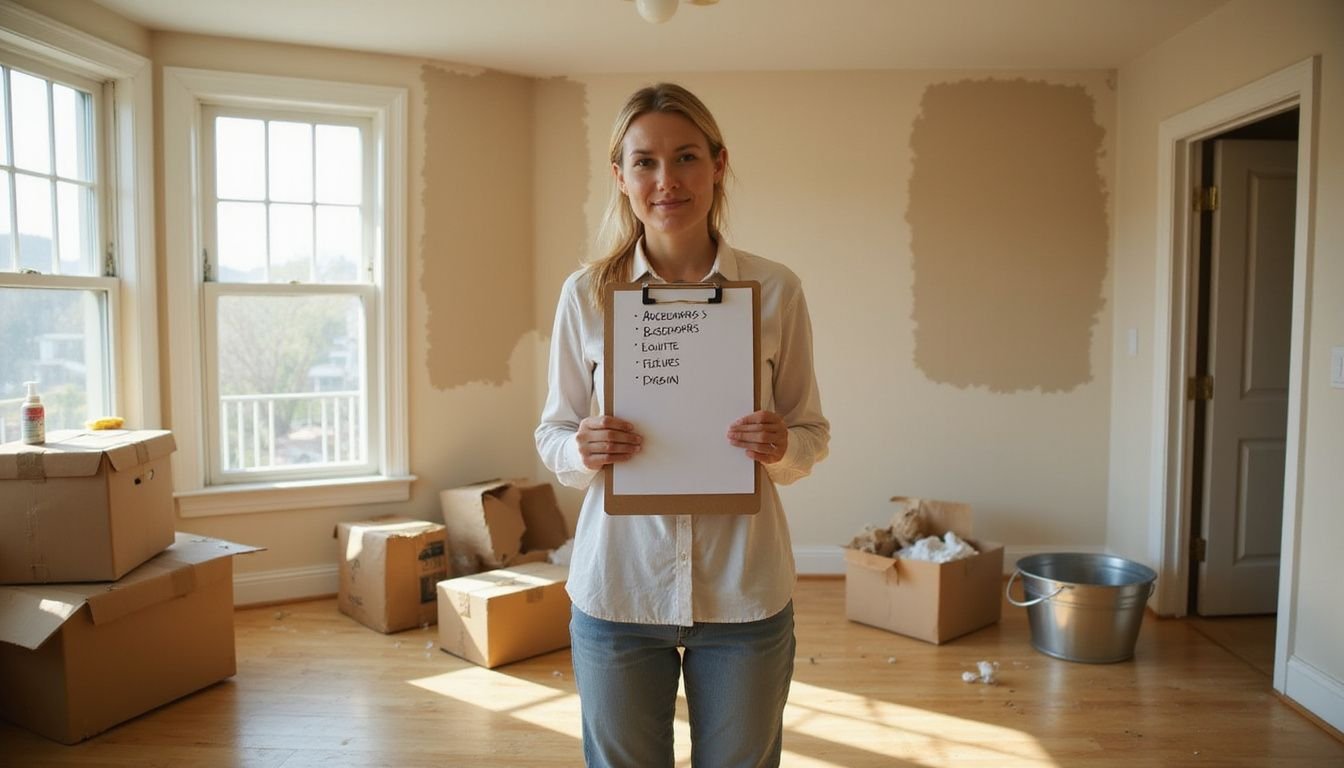
To prepare for move-out cleaning, create a detailed checklist. This list should cover all the vital areas to clean and organize before moving day.
Create a cleaning checklist
A clear checklist saves time and raises the odds of getting the full deposit back. The guide points to military housing lists, a printable move-in/move-out checklist, and a Reddit thread titled “List of Cleaning Duties to receive my $1995 deposit.”
- List core rooms and tasks, and include kitchen deep cleaning, stove and oven detailing, fridge defrosting, and fan hood degreasing so landlords and property managers see thorough cleaning.
- Note bathroom duties like grout scrubbing, toilet descaling, shower door stain removal, and sink polish to meet rental agreement standards and tenant responsibilities.
- Add living area chores such as dusting ceiling fans, vacuuming carpets, cleaning vents, and steam cleaning upholstery to leave a fresh, thorough cleaning result.
- Record wall and fixture work, including nail and screw removal, hole patching, and wiping doors and baseboards to avoid repair charges from building manager or landlord.
- Include window, mirror, and glass cleaning with streak-free methods and microfiber cleaning cloths to create visible shine for inspection day.
- List floor cleaning steps that cover sweeping, mop or machine cleaning for hard floors, and professional carpet cleaning or vacuuming to prevent deposit deductions.
- Mark appliance checks like washer dryer wipe-downs and AC filter replacement, and note any repair needs so property managers can sign off without surprises.
- Schedule laundering items such as curtains, cushion covers, and bedding with recommended laundry detergent to avoid stains and odors that cost money.
- Add a decluttering sweep and an essentials box for move-out date items, and advise parents to keep kids’ toys and school items packed to speed the moving process.
- Include booking cleaning services options, listing house cleaning services like Cleaning Glow San Francisco, Aspenclean, or janitorial cleaning firms, and compare prices before the move.
- Suggest eco-friendly cleaning choices, and list natural cleaning products, EWG verified items, and microfiber cloths for safe, effective results in homes with children.
- Attach the printable move-out Cleaning Checklist and reference the Reddit thread “List of Cleaning Duties to receive my $1995 deposit” so owners can follow proven steps and aim for a stress-free moving experience.
Follow a timeline for cleaning tasks
House owners should plan cleaning early. Parents will save stress with clear steps.
- Start one month before the move-out date and buy cleaning supplies like a mop, vacuum, bucket, microfiber cloths, spackle, and gloves to service the rental property and vacation rental cleaning needs.
- Begin packing and cleaning about three weeks before moving and target guest rooms, basements, closets, and attics first; this follows the suggested timeline for deep cleaning infrequently used spaces.
- Break tasks into daily or weekly goals so chores stay small and clear; assign one room or one task each day to keep progress steady. 1
- Schedule high-traffic area work closer to the move-out date so floors, entryways, and living rooms stay tidy until the last week.
- One week before moving, focus on kitchens and bathrooms; clean appliances, cabinets, countertops, grout, and drains to meet apartment cleaning and airbnb cleaning standards.
- Reserve the final few days for final cleaning and packing, leaving only essentials for the last night and the final cleanup to avoid rushed mistakes.
- Plan for minor repairs such as filling holes, tightening fixtures, and replacing bulbs before the final walk-through to protect the security deposit and follow the ultimate moving checklist.
Next, focus on key areas like kitchens and bathrooms.
Focus on Key Areas
Cleaning the kitchen and bathrooms should be a top priority during move-out cleanup. Tackling these spaces ensures they look great for the next occupants and helps secure that deposit.
Clean kitchens thoroughly, including appliances
House owners and parents should follow cleaning tips that cover all kitchen appliances, inside and out, such as the stove, oven, fridge, and microwave. Apply oven cleaner or a vinegar and baking soda paste at the start for the toughest grime.
Soak metal range hood filters in hot water and citrus degreaser, and scrub interior horizontal fan surfaces where grease builds. Wipe counters, sinks, backsplashes, and light fixtures, and clean inside windowsills and tracks to avoid deposit deductions. 2
Follow a checklist that lists interiors and exteriors of appliances, small appliances, and floors, and vacuum and wash floors last. Use glass cleaner, Lysol or Mr. Clean, a sponge, a vacuum, and a mop for best results.
Begin these cleaning tasks one to two weeks before the move to allow time for deep work.
Deep clean bathrooms and remove stains
After cleaning kitchens thoroughly, it’s time to focus on bathrooms. A deep clean ensures every corner sparkles. Start by sanitizing the bathtub, shower walls, and glass doors. Use Clorox or a strong bathroom cleaner for tough stains in these areas.
Scrubbing Bubbles and Barkeepers Friend work well for greasy spots too.
Next, tackle the sink and toilet; don’t forget to clean inside and out of both fixtures. Mirrors can shine with proper wiping techniques while cabinet interiors often collect dust; give them attention as well.
Emptying personal items makes scrubbing easier. Lay down old towels at the door to protect cleanliness during this process. Essential tools include scrub brushes, microfiber cloths, and SOS pads for those stubborn areas like hard water stains around faucets.
Dust and vacuum all living areas
Thorough cleaning makes a significant difference when moving out. 3 Dusting and vacuuming help create a welcoming environment for new occupants.
- Clean all surfaces in the living areas to remove dust. Start from the highest points, like shelves and cabinets, and work downwards to avoid re-cleaning lower areas.
- Use a HEPA vacuum cleaner to capture allergens effectively. This choice ensures better air quality as it traps tiny particles that regular vacuums might miss.
- Dust baseboards, light fixtures, and ceiling fans to eliminate accumulated dirt. These often-overlooked spots can harbor significant amounts of dust.
- Remove cobwebs from corners and behind furniture. A clean space creates a more appealing atmosphere and prevents pests from settling in.
- Empty garbage bins in every room as part of the final cleanup process. Leaving trash can detract from the overall cleanliness of the space.
- Vacuum carpets thoroughly, including any area rugs in the living space. Ensure that every inch receives attention for optimal cleanliness.
- Damp-mop hard surface floors after vacuuming for an added layer of shine and freshness. This step ensures no residue remains behind on tiles or wood flooring.
- Clean windowsills and window tracks while dusting the area for an all-around tidy impression.
These steps will help ensure that deposit by making each living area shine bright for new residents.
Address Walls and Fixtures
When moving out, walls and fixtures need attention. Remove nails and screws from surfaces before patching any holes. Clean walls, doors, and baseboards with a damp cloth to eliminate dust and smudges. This small effort can greatly enhance the appearance of the place as it prepares for new tenants or owners.
Remove nails, screws, and patch holes
Before moving out, house owners should take care of any nails, screws, and unwanted hardware on the walls. 5 This simple task helps prevent deductions from their security deposit due to wall damage. 4
- Remove all nails and screws carefully. Use needle-nose pliers or a flathead screwdriver for stubborn hardware.
- Fill holes left behind with spackling compound. Apply it generously with a putty knife to ensure complete coverage.
- Allow the compound to dry fully before sanding it smooth. This process ensures that the repair blends in seamlessly with the surrounding wall.
- Paint over patched areas using matching paint. Choosing the same color creates a uniform appearance throughout the room.
- Double-check for leftover screws or nails in other areas, such as baseboards or moldings. Thoroughly inspecting these spots can save money on repairs later.
- Take photos of the walls after completing repairs for documentation purposes. These pictures provide evidence of work done and help avoid disputes during final inspections.
- Replace personal light fixtures with original ones if changes were made, ensuring everything appears as it did at move-in.
Following these steps makes a big difference in securing that deposit return while leaving the apartment looking its best for new tenants!
Wipe down walls, doors, and baseboards
After removing nails, screws, and patching holes, the next step focuses on wiping down walls, doors, and baseboards. This task is essential for ensuring a clean appearance.
- Use a mild cleaning solution or a magic eraser to lift scuffs and marks from the walls. Avoid harsh chemicals that may damage the paint. 2
- Work from top to bottom in each room when cleaning these surfaces. Start with ceilings before moving down to walls and baseboards.
- Dust fixtures, ceiling fans, and light switches as part of this cleaning process. These areas often collect dust but remain overlooked.
- Wipe down all doors thoroughly; include both sides for best results. Pay special attention to door frames where smudges can accumulate.
- Clean baseboards with a damp cloth or duster for thorough results. These often-hiding areas significantly impact the overall look of the property.
- Address frequently missed spots like door handles and frames around them. Overlooking these details could lead to unwelcome deductions from the security deposit.
- After finishing the walls and doors, inspect your work for missed areas or stubborn stains. A second pass can make a big difference in appearance before the final inspection.
- Finish off by ensuring that all surfaces feel clean and are free from any residue or grime left behind after cleaning tasks are complete. A neat finish creates a lasting impression on landlords or new tenants alike.
Final Cleaning Steps
Cleaning windows and mirrors adds brightness to every room. Freshly mopped floors and vacuumed carpets complete the move-out look. House owners will appreciate a polished finish that boosts their chances of getting back their deposits.
Clean windows and mirrors
Cleaning windows and mirrors plays a vital role in move-out cleaning. This task helps ensure the space looks its best for new occupants and secures the return of a deposit.
- Use glass cleaner to achieve a streak-free finish on windows and mirrors. This product works effectively, making surfaces shine.
- Clean both interior and exterior windows. Include details like window sills and tracks; these areas tend to accumulate dirt and grime.
- Address hard water stains on bathroom mirrors and shower doors. If left untreated, these stains can become challenging to remove.
- Clean all mirrors located in bedrooms, bathrooms, and living areas. Ensuring every reflective surface is spotless enhances the overall appearance.
- Dust and wipe down all window frames during final cleaning. This step removes dust that settles over time, creating a cleaner look.
- Don’t forget medicine cabinet mirrors in the bathroom. These often get overlooked but contribute to a complete clean.
- Vacuum any mirrored surfaces throughout the apartment. This ensures no dust remains on surfaces that reflect light.
Each of these steps significantly contributes to move-out cleaning success. Following this checklist allows homeowners and parents to leave their space in excellent condition for future residents.
Mop floors and vacuum carpets
Clean windows and mirrors sets the stage for a spotless finish. Now, focus on mopping floors and vacuuming carpets to ensure a thorough move-out cleaning. 2
- Use a microfiber mop with a safe floor cleaner. This method effectively removes dirt and grime while protecting the surface.
- Mop and rinse vinyl floors to maintain their appearance. A clean mop ensures no residue remains, leaving them shiny.
- Vacuum every inch of the apartment. Include carpets, area rugs, and hard surfaces to capture all dust and debris.
- For carpets, utilize a powerful carpet cleaner like Rocco & Roxie. This device will eliminate stubborn stains that may threaten your deposit.
- Polish hardwood floors to keep them in excellent condition. Touch up any gashes or scuffs with wood filler for an immaculate look.
- Sweep all floors before mopping or vacuuming for the best results. Removing large debris makes these tasks easier and more effective.
- Clean carpet edges where the installation may have shifted from the baseboard. This step shows attention to detail that landlords appreciate.
- After finishing floor tasks, perform a final check of all rooms. Ensure no spots were overlooked during the cleaning process.
Taking these steps guarantees clean floors and carpets, boosting chances of receiving the full security deposit back.
Conclusion
Moving out means more than packing boxes. It involves cleaning every corner of the apartment to ensure a full deposit return. Following a checklist can simplify this process. Focus on critical areas like kitchens and bathrooms for effective cleaning.
Document the apartment’s condition with photos before leaving. These steps help secure that hard-earned money while making a smooth transition to the next place.
FAQs
1. What are the key move out cleaning tasks to secure my deposit?
Clean the kitchen well, wipe counters, scrub sinks, and clean inside the kitchen appliance. Deep clean the bathroom, scrub the tub, toilet, and tiles. Clean all flooring, remove stains, and vacuum. Wipe walls, fill small holes, and replace light bulbs. Take dated photos and keep receipts for proof.
2. When should I start move out cleaning?
Begin two weeks before your move. Do small tasks early, like clearing cupboards and fixing nails. Book a deep clean one to three days before you leave. Ask your landlord for a final inspection date.
3. Can I save money by cleaning myself or should I hire professionals?
You can save money by cleaning yourself if you follow a checklist and work carefully. Professionals often do a better job on deep cleaning tasks like flooring and tough stains. Check your lease for any required services. Compare cost and time to decide.
4. What myths can hurt my chances of getting my deposit back?
Myth, minor dirt never costs you your deposit. This is false, heavy stains and damage can reduce your refund. Myth, you must always repaint the whole place. This is not true for normal wear. Read your lease, document the unit, and fix clear damage before you move.
References
- ^ https://www.boardwalkcleaning.com/last-minute-move-out-cleaning-checklist25-must-do-tasks-before-you-leave/ (2025-09-12)
- ^ https://orioncleaning.com/move-in-move-out-cleaning-checklist/
- ^ https://www.pods.com/blog/move-out-cleaning-checklist (2025-04-30)
- ^ https://handymanconnection.com/blueash/articles/avoid-move-out-deductions-with-simple-home-repairs/ (2026-02-27)
- ^ https://thecleanstart.com/ultimate-move-out-cleaning-guide-for-getting-your-security-deposit-back/ (2021-11-30)