Category: House Cleaning

  • How To Clean Your Kitchen Cabinets Like A Pro

    How To Clean Your Kitchen Cabinets Like A Pro

    Stained and sticky cabinets can make any kitchen feel messy. Many homeowners struggle to remove grease or stains, even after wiping again and again. How To Clean Your Kitchen Cabinets sometimes seems like a big job, but with the right steps, anyone can get great results.

    Most kitchen cabinets collect dust and splatters every week. In fact, studies show that regular cabinet cleaning helps prevent damage from dirt or moisture. These habits keep your space looking fresh for longer.

    This guide will walk readers through simple supplies, step-by-step routines, and expert tips for tackling cabinet messes. Readers will learn which ecofriendly cleaners are best for their home and how to use safe scrubbing techniques on different surfaces.

    Discover easy ways to master kitchen maintenance in just a few minutes each week!

    infographic how to clean your kitchen cabinets like a pro 5020570

    Essential Supplies for Cleaning Kitchen Cabinets

    essential supplies for cleaning kitchen cabinets 384285922

    To clean kitchen cabinets effectively, gather essential supplies beforehand. Microfiber cloths and a mixture of dish soap with warm water work wonders for regular cleaning tasks.

    Microfiber cloths

    Microfiber cloths pick up dust, crumbs, and grease without scratching kitchen cabinet surfaces. Their fine fibers trap dirt better than old rags or paper towels. Many professional cleaning services use microfiber for surface cleaning because it leaves fewer streaks and reduces the risk of damage to wood or laminate cabinets.

    A quality microfiber cloth can last through dozens of washes, making it an ecofriendly cleaner and cost-effective choice.

    Using a dry or slightly damp microfiber cloth works well for everyday dusting cabinets and removing light fingerprints. For tougher spots like greasy handprints near handles, pairing the cloth with a bit of dish soap helps loosen grime gently.

    Dish soap and warm water will make quick work of sticky buildup on your cabinet surfaces. Up next is a closer look at dish soap solutions for effective kitchen cabinet cleaning results.

    Dish soap and warm water

    A mix of dish soap and warm water handles surface cleaning for kitchen cabinets well. Dish soap cuts through grease and grime without damaging wood or laminate finishes. Most experts recommend adding just a few drops of mild, ecofriendly cleaner to a bucket of warm water.

    Use a soft cloth soaked in the solution to wipe cabinet surfaces in gentle circles. Rinse the cloth often to avoid spreading dirt.

    This technique offers an affordable and nontoxic way for homeowners and parents to maintain cabinet hygiene. Mild dish soap keeps bacteria at bay while protecting delicate surfaces from harsh chemicals found in some commercial cleaning solutions.

    For daily messes or light grease removal, this method keeps things simple yet effective.

    A little soapy water can go a long way on stubborn kitchen stains.

    For tough marks or sticky spots that resist regular cleaning, try using vinegar or baking soda next.

    Vinegar or baking soda for tough stains

    Vinegar and baking soda both work well for removing stubborn stains from kitchen cabinets. Vinegar acts as an ecofriendly cleaner that cuts through grease and grime, making it perfect for surface cleaning on both wood and laminate cabinets.

    Mix equal parts white vinegar and warm water in a spray bottle. Spray the solution on stained areas, then wipe with a microfiber cloth using gentle scrubbing techniques.

    For sticky or caked-on spots, apply a paste of baking soda and water directly to the stain. Let it sit for 10 minutes before wiping clean with a damp cloth. Baking soda provides excellent grease removal without scratching cabinet surfaces or harming wood care finishes.

    Follow up these methods before starting regular dusting routines for best results.

    Regular Cleaning Routine

    Cleaning kitchen cabinets regularly keeps them looking fresh. Dust and grease can build up, making surfaces appear dull. Wiping down cabinets with a microfiber cloth removes grime effectively.

    This simple routine ensures that cabinet doors shine every day.

    Dusting and wiping down cabinet surfaces

    Dust cabinet surfaces regularly to keep them looking fresh. Use a microfiber cloth for effective dusting. This tool traps dust and prevents it from flying around. After dusting, dampen the cloth with warm water and a few drops of dish soap.

    Wipe down each surface thoroughly.

    Focus on areas where grease or fingerprints might build up. Pay special attention to knobs, handles, and edges. For tougher stains, try using vinegar or baking soda; these eco-friendly cleaners work wonders on stubborn spots without harsh chemicals.

    Regular cleaning will keep kitchen cabinets in top shape while maintaining a pleasant environment for cooking and family gatherings.

    Removing grease and fingerprints

    Grease and fingerprints can make kitchen cabinets look dirty. First, grab a microfiber cloth. This type of cloth lifts dirt without scratching surfaces. Mix dish soap with warm water in a bowl.

    Dampen the cloth with this soapy solution.

    Wipe down the cabinet doors using gentle pressure. Focus on greasy spots and areas where fingerprints linger. For tougher stains, mix vinegar or baking soda into your cleaning routine.

    These natural cleaners are effective for breaking down stubborn grease while keeping surfaces safe from damage. After cleaning, use a dry microfiber cloth to buff the cabinets for a shiny finish.

    Deep Cleaning Method

    To deep clean kitchen cabinets, first empty them completely. After removing all items, tackle debris and dust with a soft cloth before applying your chosen cleaning solution for scrubbing.

    Emptying cabinets and removing debris

    House owners should start by emptying their kitchen cabinets. This means taking out all dishes, pots, and pans. Next, they need to check for any expired items or clutter. Clearing out unnecessary debris helps create a fresh space for cleaning.

    After removing the contents, wiping down the shelves becomes essential. Dust and crumbs often hide in corners. A microfiber cloth works well for this task. By completing these steps, individuals set the stage for a thorough deep clean of their cabinet surfaces.

    Scrubbing with a safe cleaning solution

    After emptying the cabinets and removing debris, choose a safe cleaning solution for scrubbing. A mixture of dish soap and warm water works well for most surfaces. For tough stains, vinegar or baking soda can be effective options.

    Use a microfiber cloth to scrub down the cabinet surfaces gently. This method ensures no scratches occur while effectively lifting dirt and grease. Make sure to rinse the cloth frequently to avoid spreading grime around.

    Keep moving in small sections to cover every area thoroughly.

    Tips for Maintaining Cabinets

    To maintain cabinets, homeowners should regularly check for signs of wear and tear. Utilizing shelf liners can help keep surfaces clean while providing protection against spills and scratches.

    Use shelf liners to protect interiors

    Shelf liners keep kitchen cabinet interiors safe from damage. These liners shield surfaces from scratches, grease, and spills. They make cleaning easier since you can simply wipe down the liner instead of scrubbing the entire shelf.

    Choose a liner that suits your cabinets. Options include adhesive or non-adhesive types in various colors and patterns. This small addition enhances both protection and aesthetics, making cabinets look neat and organized while ensuring longevity.

    House owners will appreciate how easy it is to maintain clean surfaces with these practical solutions in place.

    Avoid harsh chemicals or abrasive tools

    Use eco-friendly cleaners to protect kitchen cabinets. Harsh chemicals can damage wood finishes and laminates over time. Opt for gentle solutions like vinegar or baking soda instead.

    These options effectively tackle grease removal while being safer for your family and the environment.

    Avoid abrasive tools that scratch surfaces. Microfiber cloths work best because they are soft yet effective at lifting dirt and grime. Using non-toxic cleaners along with these cloths ensures a clean finish without harming cabinet materials.

    Conclusion

    Cleaning kitchen cabinets can transform any space. With the right supplies, anyone can tackle dirt and grime effectively. Regular maintenance keeps cabinets looking fresh and new. Embrace these techniques for a cleaner, more organized kitchen.

    A little effort goes a long way in achieving that professional look.

    FAQs

    1. What are the best products to clean kitchen cabinets?

    To clean kitchen cabinets like a pro, use gentle cleaners such as warm soapy water or vinegar mixed with water. Avoid harsh chemicals that can damage finishes.

    2. How often should I clean my kitchen cabinets?

    You should clean your kitchen cabinets at least once a month. Regular cleaning prevents buildup and keeps them looking fresh and new.

    3. Should I remove items from my cabinets before cleaning?

    Yes, removing items helps you reach all surfaces easily. It also allows for a thorough inspection of any spills or stains inside the cabinet.

    4. How do I tackle tough stains on my cabinet doors?

    For tough stains, create a paste using baking soda and water. Apply it to the stain, let it sit for a few minutes, then gently scrub with a soft cloth until it lifts away.

  • How To Clean And Organize Your Closet Like A Pro

    How To Clean And Organize Your Closet Like A Pro

    Messy closets often cause stress in busy homes. Many people struggle to find their favorite shirt, shoes, or that extra pair of jeans under piles of clothes and clutter. Overflowing hangers and crowded shelves waste time every morning.

    Studies show that most people wear only 20% of what is in their closet. This means a huge chunk of space goes unused or gets filled with items never worn. Expert closet organization can save both time and money.

    This guide will break down each step for “How To Clean And Organize Your Closet Like A Pro.” Readers will learn simple ways to sort, clean, and arrange clothing using proven tips from professional organizers.

    Get ready for a fresh start that makes mornings easier than ever. Discover smarter ways to tackle your mess today!

    infographic how to clean and organize your closet like a pro 5020424

    Empty Your Closet Completely

    empty your closet completely 381677473

    Initiating the process of closet organization involves a crucial step of emptying your closet in its entirety. This action paves the way for a successful and effective decluttering and reorganization process.

    1. Initiate by evacuating every piece of clothing, footwear, and accessories from the closet. This reveals unseen items and provides an unobstructed view of the space at hand.
    2. Arrange everything on a spacious, neat surface. Utilizing a bed or a pristine floor would be appropriate for this action.
    3. Utilize this opportunity to examine each piece for signs of wear and tear. Observe the seams, fabric strength, and the general state of the item.
    4. Assign separate bins or sections for different categories like ‘keep,’ ‘donate,’ and ‘discard.’ This eases the decision-making process.
    5. Assess seasonal attire with a critical perspective. Determine whether to continue its cycle or put it away for storage.
    6. Review items that have stayed unworn for over a year. It is likely these could be contributed.
    7. In the case of families, include household members in sorting their own possessions. This promotes collective participation in the decluttering process.
    8. Inspect pockets, handbags, and secret compartments for overlooked items before finalizing decisions on each article.
    9. Think about reserving distinctive or costly items that could potentially be sold rather than donated or discarded.
    10. Lastly, compile a list of what stays to guarantee you retain only what you truly utilize or cherish.

    By following these steps, an effective closet organization process is facilitated, offering a clear understanding of what belongings are genuinely worth retaining and which ones can be excluded to significantly simplify wardrobe management and upkeep efforts.https://www.youtube.com/watch?v=a-TFbunklsQ

    Sort Your Items into Categories

    Clearing out the closet entirely, homeowners and parents can then categorize their items into sections like keep, donate, and discard, streamlining the decluttering process. Rotating seasonal clothing guarantees a well-ordered space that accommodates the demands of a constantly evolving wardrobe.

    Keep, Donate, and Discard

    Decluttering a closet involves making tough decisions about what stays and what goes. House owners and parents face the challenge of sorting through items to create a minimalist wardrobe that reflects their current lifestyle and preferences.

    • Keep: Choose items that fit well, get regular use, and bring joy. Anything that is part of a capsule wardrobe or serves multiple purposes should stay. This includes clothing that matches personal style, favorite pieces, or those necessary for work and special occasions.
    • Donate: Clothing in good condition but no longer worn deserves a second life with someone else. Consider donating to local shelters, charity shops, or community centers. Items perfect for donation include out-of-style clothes still in good shape, gently used children’s clothing that they have outgrown, and duplicate items where only one is used.
    • Discard: Discard clothing that is beyond repair, stained, or damaged. This includes socks with holes, underwear past its prime, and anything else not suitable for donation or selling. Responsibly disposing of these items helps keep the closet free from clutter.

    After sorting the closet into these categories, transitioning seasonal clothing becomes easier.

    Transition Seasonal Clothing

    Transitioning seasonal clothing is a crucial element of closet organization. It assists homeowners and parents in maintaining a practical and orderly wardrobe throughout the year.

    1. Spot clothing that is no longer appropriate for the current season. Scan your wardrobe to locate items you won’t be using in the upcoming months.
    2. Clean the selected clothes prior to storage. This action helps to ward off musty smells and maintain the condition of the clothes.
    3. Opt for suitable storage methods. Consider vacuum-sealed bags or bins for voluminous items such as winter coats to conserve space.
    4. Clearly mark storage containers. Designate them with identifiers like the season, year, or type of clothing for simple identification later on.
    5. Keep non-seasonal items in a space that is cool and dry. Try to skip locations with a tendency for dampness like basements or attics if feasible.
    6. Rotate fundamental items according to forthcoming weather patterns. Keep a selection of versatile pieces at hand for unexpected weather shifts.

    This strategy helps keep your space orderly and also simplifies the process of assembling outfits speedily.

    Subsequently, acquire knowledge on how to efficiently cleanse your closet space for a refreshing beginning.

    Clean Your Closet Space

    Remove all items from the closet. Dust shelves, wipe down surfaces; consider repainting or installing new lighting to refresh the space. Vacuum or sweep the floor thoroughly before placing items back in.

    Use a microfiber cloth and mild cleaner to dust off any accessories or decorations.

    Consider implementing vacuum-sealed bags for seasonal clothes that aren’t currently being used to save space and protect your clothing from damage. Utilize storage solutions such as baskets, hooks, and bins to keep things organized while making it easier to find what you’re looking for amidst the chaos of everyday life.

    Maximize Your Closet Storage

    Optimize your closet storage by using organizers and dividers to make the most of the space, strategically hanging clothes for easy access, and arranging items based on accessibility. Find out more for expert advice on maximizing your closet space!

    Use Organizers and Dividers

    Maximize closet space by utilizing organizers and dividers. Implementing these tools can significantly improve the functionality of your wardrobe. By using shelf dividers, one can neatly separate stacks of sweaters or handbags, preventing them from toppling over and creating a cluttered mess.

    Moreover, drawer organizers are perfect for keeping socks, undergarments, and accessories tidy and easily accessible. Hanging organizers can also optimize vertical space in the closet while ensuring that items such as shoes or scarves remain organized and visible, making it easier to grab what you need when rushing out the door.

    Now let’s explore strategically hanging clothes to maximize space efficiently in your closet.

    Hang Clothes Strategically

    To enhance the functionality of a closet, strategic organization of clothes can make a significant difference. By arranging items based on their frequency of use, individuals can optimize space and improve accessibility.

    This involves placing frequently worn garments at eye level while reserving higher or lower sections for less-used items. Moreover, grouping similar clothing types together not just streamlines the process of selecting outfits but also maximizes available storage.

    In addition, using slim-line hangers conserves space and creates a uniform appearance within the closet. Homeowners and parents should consider integrating these strategies to effectively manage their wardrobe while enhancing overall organization and decluttering endeavors.

    Arrange Items by Accessibility

    House owners and parents can make their closets more efficient by arranging items based on accessibility. This makes it easier to find what you need and maintain an organized space, especially when juggling household responsibilities.

    • Place frequently used items at eye level or within easy reach.
    • Store seasonal or less frequently used items on higher shelves or in less accessible areas.
    • Utilize storage bins or baskets for smaller items like accessories and undergarments.
    • Group similar items together to streamline the search process, for example, keeping all shirts together and pants in another area.
    • Consider adding hooks or racks to the closet door for commonly worn outerwear or bags.
    • Implement a rotating system for children’s clothing, ensuring that their most worn items are readily available.

    Maintain Your Organized Closet

    To maintain an organized closet, regularly assess clothes to remove any items that are no longer worn or needed. House owners and parents can make this a seasonal habit to keep the wardrobe clutter-free.

    Implement a rule of “one in, one out” to avoid accumulating excess clothing. Utilize organizers and dividers for efficient storage solutions, ensuring all items have designated spaces within the closet.

    By following these practices, individuals can ensure their closets stay neat and functional throughout the year.

    In addition, rotating seasonal clothing with each change in weather helps maximize storage space. As summer turns to fall or winter transitions into spring, consider swapping out clothing to accommodate the current season’s needs while keeping the closet well-organized at all times.

    These simple yet effective strategies contribute significantly to maintaining an orderly closet for house owners and parents alike.

    Conclusion

    In conclusion, cleaning and organizing a closet like a pro requires dedication and proper planning. Emptying the closet completely is vital for sorting items efficiently. Utilizing organizers and dividers can maximize storage space effectively.

    Arranging items by accessibility ensures easy retrieval of clothing. Maintaining an organized closet regularly is essential for sustaining the achieved organization. Applying these actionable steps will result in a well-organized closet that allows easy access to desired items whenever needed.

    FAQs

    1. What are the first steps to clean my closet?

    Start by emptying your closet completely. Remove all items and sort them into categories like keep, donate, or discard. This helps you see what you have.

    2. How can I organize my closet effectively?

    Use storage bins and hangers wisely. Group similar items together, such as shirts with shirts and shoes with shoes. Label boxes for easy access to everything.

    3. What common mistakes should I avoid while organizing?

    Avoid keeping clothes that no longer fit or that you haven’t worn in a year. Do not overcrowd your space; this makes it harder to find what you need.

    4. How often should I clean and organize my closet?

    Aim to clean your closet at least twice a year. Regularly check for items you no longer use, keeping your space organized and functional over time.

  • How To Remove Scratches From Floor Tiles Easily

    How To Remove Scratches From Floor Tiles Easily

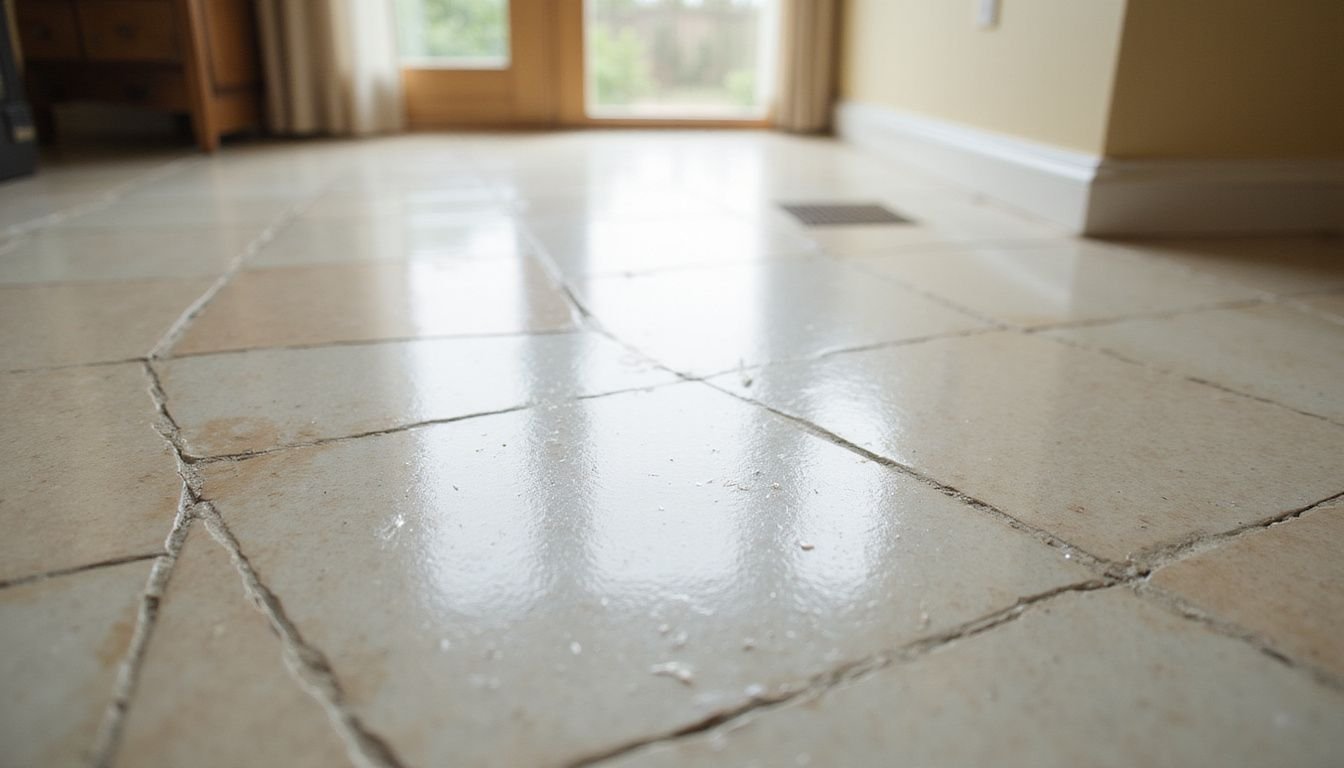
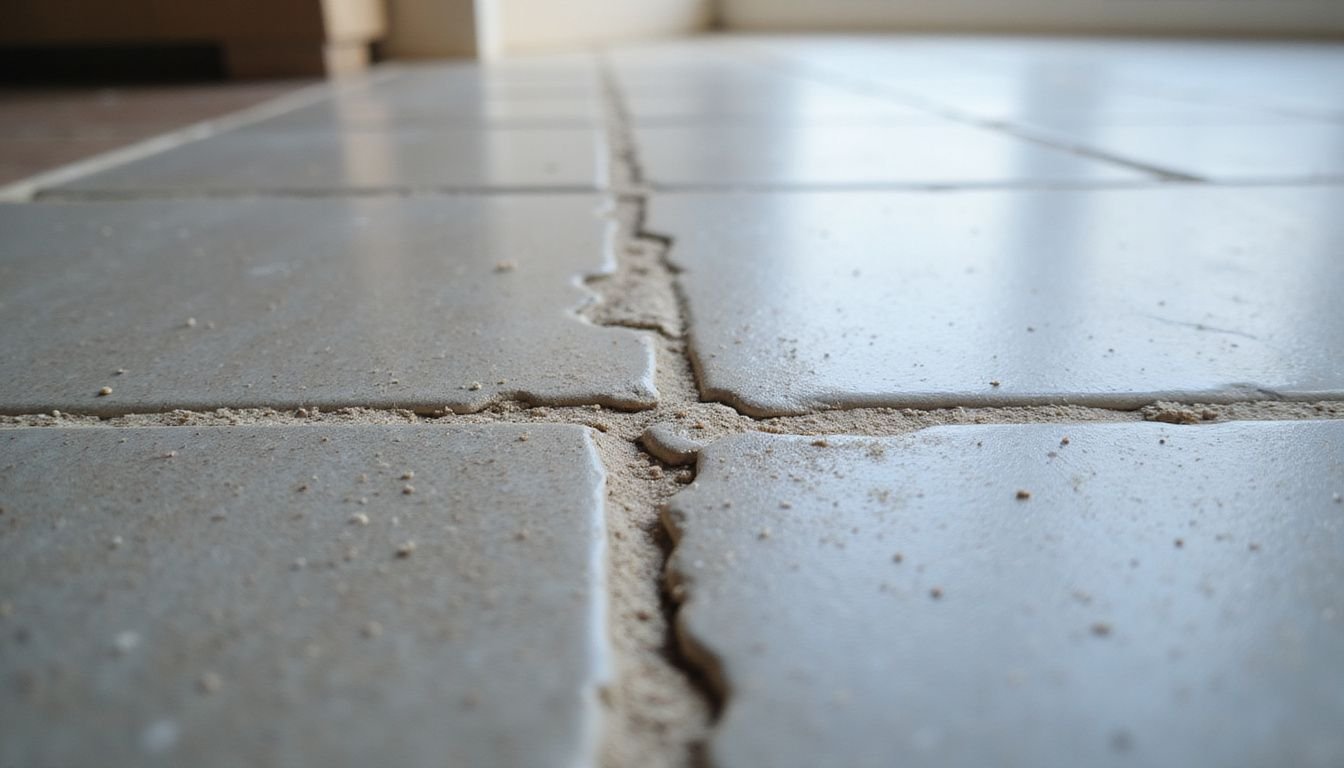
    Scratches on floor tiles can ruin the look of any home. Many house owners and parents worry when they see marks or scuffs on their bathroom, kitchen, or hallway tiles. Even a tiny scratch can be hard to ignore, especially if it stands out against clean, shiny floors.

    Fact shows that both ceramic and porcelain tiles are strong but still get scratched from heavy furniture, dropped items, or pet claws. The good news is that simple methods exist for those searching for easy ways of how to remove scratches from floor tiles easily at home.

    This guide breaks down quick fixes and proven products you can use without calling in a professional. Find smart tips below that make tile scratch removal much easier than most people think!

    infographic how to remove scratches from floor tiles easily 5020315

    Methods to Remove Light Scratches

    methods to remove light scratches 381509606

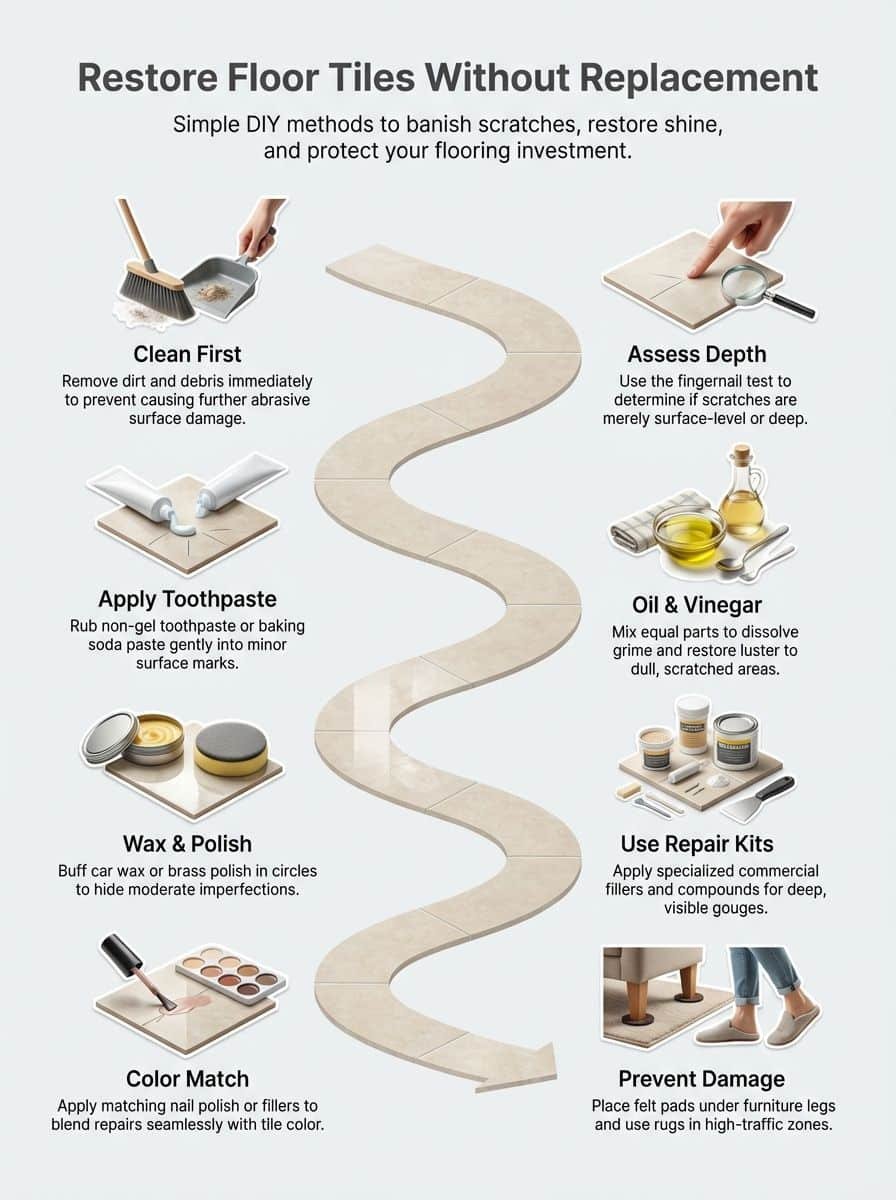
    You can use toothpaste to tackle minor scratches. Applying a baking soda paste can also help address surface marks effectively.

    Use toothpaste for minor scratches

    Toothpaste works as a simple solution for removing light scratches from ceramic or porcelain floor tiles. Homeowners should use a non-gel, white toothpaste and apply it directly to the scratched area.

    Rub gently with a soft cloth in circular motions for up to 30 seconds. The mild abrasive in toothpaste helps smooth out surface marks without damaging glazed ceramic tile finishes.

    Wipe away any residue with a damp microfiber cloth to reveal improved results. This easy DIY tile scratch repair technique can help reduce visible bathroom tile scratches and maintain the look of high-traffic floors.

    If small marks remain, move on to using a baking soda paste for stubborn surface imperfections.

    Apply baking soda paste for surface marks

    Baking soda works as a gentle abrasive for easy tile floor scratch removal. Mix three tablespoons of baking soda with one tablespoon of water to form a paste. Spread the mixture over the scratched area and rub in small circles using a soft, damp cloth.

    This method helps clean off surface marks without harming glazed ceramic tiles or porcelain floors.

    After gently scrubbing, rinse away any residue with clean water. Dry the spot with a microfiber towel. For most light scratches on bathroom tile or ceramic surfaces, this home remedy provides fast results without harsh chemicals.

    Many DIY tile scratch repair tips recommend baking soda because it is safe around children and pets while protecting tile finishes from further damage.

    Techniques for Deeper Scratches

    To address deeper scratches on floor tiles, one can utilize a tile scratch repair kit for a professional fix. Another effective technique involves the application of wax or epoxy to fill in and conceal the scratches, providing a seamless finish.

    Use a tile scratch repair kit

    A tile scratch repair kit offers a quick solution for deeper marks that stand out on ceramic or porcelain tiles. These kits usually contain a filler, color compounds, and finishing pads.

    Anyone can follow the simple instructions to cover scratches and blend repairs into the surrounding floor. For bathroom tile scratch removal, choose a water-resistant formula.

    Tile floor scratch removal using these kits works well for both glazed ceramic tile scratch removal and repairing scratches on porcelain tiles. House owners see immediate results without needing expensive help or replacing entire tiles.

    DIY tile scratch repair products save money while protecting homes with kids or pets where accidents happen often.

    Apply wax or epoxy to fill scratches

    Applying wax or epoxy is an efficient way to conceal scratches on floor tiles. This method effectively hides the marks and restores the tiles to their original condition. The application of wax or epoxy forms a protective layer that not just conceals scratches but also improves the tiles’ ability to resist future damage.

    This simple approach offers a cost-effective solution for preserving flawless floor tiles in homes and guarantees enduring durability.

    Additional Tips for Scratch Removal

    To remove scuff marks, consider using a soft eraser. For a smooth finish, polish the tiles with a microfiber cloth.

    Use a soft eraser for scuff marks

    To eliminate scuff marks on floor tiles, house owners and parents can effectively use a soft eraser. Gently rubbing the scuffed area with a soft eraser can help lift and minimize the appearance of these marks without damaging the tile’s surface.

    This simple yet effective method is especially handy for addressing minor scuffs caused by shoes, furniture, or other daily activities, providing an easy DIY solution for maintaining pristine floor tiles.

    Keep in mind to not scrub too vigorously; instead, apply gentle pressure when using the soft eraser to avoid inadvertently scratching or marring the tile further. By including this straightforward technique into regular maintenance routines, homeowners can ensure their floor tiles remain free from unsightly scuff marks, enhancing the overall aesthetic appeal of their living spaces while preventing unnecessary wear and tear on tiled surfaces.

    Polish with a microfiber cloth for a smooth finish

    Use a microfiber cloth to polish the tiles for a smooth, glossy finish. Gently buff the surface in circular motions until it achieves the desired sheen. The microfiber material is gentle on tile surfaces and helps to reduce streaks or residue, leaving your floor looking pristine and well-maintained.

    For House Owners & ParentsKeywords: Floor tile maintenance, Tile floor care tips

    Post-Construction Cleaning Tips for Newly Installed or Repaired Floor Tiles

    After newly installing or repairing floor tiles, it’s important to follow these post-construction cleaning tips to maintain the tiles’ appearance and durability:

    1. Use a mild, pH-neutral cleaner to wipe down the entire tiled surface. This will remove any construction debris, dust, or grime that may have accumulated during the installation or repair process.
    2. Thoroughly rinse the cleaned area with clean water and allow it to dry completely before walking on the tiles or placing any furniture or fixtures on them.
    3. Apply a high-quality tile sealer to protect the tiles from stains, moisture, and everyday wear and tear. Be sure to follow the manufacturer’s instructions for optimal application and drying times.
    4. Regularly sweep or vacuum the tiled surface to prevent dirt buildup, and promptly address any spills or stains using appropriate cleaning products recommended for your specific tile type.
    5. Consider placing felt pads under heavy furniture legs to minimize scratching and scuffing on the newly installed or repaired floor tiles.

    Conclusion

    In conclusion, effectively eliminating scratches from floor tiles can be accomplished using straightforward methods and techniques. Homeowners and parents can use everyday items such as toothpaste or baking soda to efficiently eliminate light scratches from ceramic or porcelain tiles.

    For deeper scratches, they can choose tile scratch repair kits or utilize wax and epoxy to seamlessly fill in the scratches. Moreover, employing a soft eraser for scuff marks and polishing with a microfiber cloth will guarantee a smooth finish.

    By following these uncomplicated steps, individuals can effortlessly preserve the beauty of their floor tiles.

    FAQs

    1. What are common ways to remove scratches from floor tiles?

    Common methods include using a baking soda paste, applying a specialized tile scratch remover, or utilizing a magic eraser for minor scratches.

    2. Can I use household items to fix scratches on my floor tiles?

    Yes, many household items can help. For example, a mixture of baking soda and water creates an effective paste that can reduce the appearance of scratches.

    3. How do I apply the scratch-removal method effectively?

    First, clean the scratched area thoroughly. Then, apply your chosen solution with a soft cloth or sponge in gentle circular motions until you see improvement.

    4. Are there preventive measures to avoid future scratches on my floor tiles?

    To prevent future scratches, place mats at entryways and use furniture pads under heavy items; regular cleaning also helps maintain tile surfaces without damage.

  • How To Clean Your Refrigeration Like A Pro In 4 Simple Steps

    How To Clean Your Refrigeration Like A Pro In 4 Simple Steps

    Many homeowners open their fridge and see sticky spills, old food, and pesky odors. This mess is not just unpleasant; it can also make your kitchen less clean and even affect your family’s health.

    Cleaning fridge shelves or organizing the refrigerator may feel overwhelming, but a few smart steps can change everything.

    Experts say that deep cleaning appliances like refrigerators at least four times a year helps prevent bacteria growth and keeps food fresh longer. If you want to master how to cleaning your refrigeration like a pro in 4 simple steps, this guide will break down each part so anyone can do it with confidence.

    Discover easy tricks for tackling stains, removing bad smells, and keeping everything spotless inside and out. Master these quick tips for a fresher kitchen today!

    infographic how to clean your refrigeration like a pro in 4 simple steps 5020139

    Step 1: Remove All Food, Shelves, and Drawers

    step 1 remove all food2C shelves2C and drawers 381040773

    House owners and parents often overlook the importance of thoroughly cleaning their refrigerators. Starting with removing all food, shelves, and drawers can make the process more efficient.

    1. Turn off the refrigerator to ensure safety before beginning any cleaning process.
    2. Empty the fridge of all food items, sorting them into perishables and non-perishables.
    3. Check expiration dates on food as you remove them to discard anything that is no longer safe to eat.
    4. Place perishable items in a cooler with ice to keep them fresh during the cleaning process.
    5. Carefully remove all shelves, drawers, and any removable parts from the refrigerator.
    6. Soak removable parts like shelves and drawers in warm, soapy water to loosen grime and food particles.
    7. Use a soft cloth or sponge to wipe down these parts after soaking, focusing on removing stubborn stains.
    8. Rinse shelves and drawers thoroughly with clean water before setting them aside to dry.
    9. Ensure all removed food is either disposed of or stored properly while cleaning continues.

    This methodical approach simplifies deep cleaning by providing unobstructed access to the interior surfaces of the refrigerator for a thorough cleanse.https://www.youtube.com/watch?v=WaWkeBCazD4

    Step 2: Deep Clean the Interior of the Refrigerator

    After clearing the refrigerator entirely, it’s time for extensive cleaning of the inside. This process guarantees your fridge maintains cleanliness and sustains food safety.

    1. Ensure safety first by disconnecting the refrigerator before you start the cleaning.
    2. Prepare an effective and natural cleaner by mixing warm water and baking soda, using approximately one tablespoon of baking soda per quart of water.
    3. Soak a gentle cloth or sponge in the baking soda mixture to cleanse all the inner surfaces of the fridge. Be mindful of corners and hidden areas where food particles and liquids may gather.
    4. Directly apply the baking soda mixture to resistant stains and let it soak for a few minutes before wiping it clean. This approach effectively removes fridge stains without utilizing harsh chemicals.
    5. Use mild soap and water to clean the gasket surrounding the door, then thoroughly dry it to stop mildew formation.
    6. Use a clean, damp cloth to rinse all surfaces eliminating any remaining cleaning mixture.
    7. Dry all the sections with a clean towel or leave them to air-dry with the door left open for a short period before reconnecting the refrigerator.

    This detailed interior cleaning eliminates smells, avoids mold formation, and keeps your refrigerator in prime condition, ensuring safe storage for family meals.https://www.youtube.com/watch?v=-RDvKNjJ0yg

    Step 3: Clean Underneath and Behind the Refrigerator

    The efficiency and freshness of your refrigerator can be greatly enhanced by cleaning the unseen dust and debris underneath and behind it, which may affect its operation.

    1. The first step in any cleaning process is to disconnect the refrigerator to maintain safety.
    2. For a comprehensive cleaning, it’s important to move the refrigerator away from the wall, even if it requires a bit of effort.
    3. Utilize a coil brush or a vacuum cleaner component to clean the condenser coils from dust. Remember, dust buildup makes the refrigerator function harder, thereby raising power usage.
    4. The floor area under the fridge can collect dirt and food remnants, so it’s critical to clean it with mild soap and warm water.
    5. Use a moist cloth to clean the walls behind the fridge, eradicating any accumulated splashes or stains.
    6. Don’t forget to inspect and clean any drip trays or water pipes near or underneath your refrigerator, as neglecting these areas can foster bacterial growth.
    7. When done, position your refrigerator back in its spot cautiously, preventing any harm to the floor or the unit.
    8. Only after all surfaces are dry and everything is back in place should you reconnect the power, preventing potential electrical mishaps due to dampness.

    By following these steps, you can extend your refrigerator’s longevity and preserve its energy efficiency, ensuring its steady operation.https://www.youtube.com/watch?v=3eiYfVrXu8o&pp=0gcJCdgAo7VqN5tD

    Step 4: Wipe Down the Exterior Surfaces

    After thoroughly cleaning the interior and hard-to-reach areas of the refrigerator, it’s time to focus on wiping down the exterior surfaces. This step is essential for maintaining a clean and hygienic fridge, especially in households with children or pets. Here are the crucial steps to wipe down the exterior surfaces of your refrigerator:

    1. Begin by combining a solution of mild dish soap and warm water in a bowl. Utilize a soft sponge or microfiber cloth to gently scrub the exterior surfaces, including the door, sides, and top.
    2. Pay special attention to handles and any control panels, as these areas tend to accumulate fingerprints and spills. Carefully wipe them down to ensure all grime is removed.
    3. For stainless steel exteriors, consider using a specialized stainless steel cleaner to achieve a streak-free shine without causing damage or discoloration.
    4. After wiping down all surfaces, use a clean, dry microfiber cloth to polish the exterior of the refrigerator, eliminating any remaining moisture or residue for a polished finish.

    Regular maintenance will not only keep your refrigerator looking pristine but also extend its lifespan while ensuring food safety and hygiene for your household.

    1. Once the exterior is spotless, take an additional moment to organize any magnets or decorations on the fridge after cleaning for an overall tidy appearance.

    Conclusion

    In conclusion, cleaning your refrigerator like a pro in four simple steps is attainable for any house owner or parent. By following the outlined steps, one can maintain a clean and organized fridge with ease.

    Thoroughly cleaning the interior, wiping down the exterior surfaces, and addressing tough stains are essential tasks to ensure proper hygiene in the kitchen. These practical tips provide actionable guidance for individuals seeking efficient fridge maintenance methods.

    Ultimately, maintaining a clean and sanitized refrigerator contributes to overall kitchen hygiene and ensures a healthy living environment for the whole family.

    FAQs

    1. What are the four simple steps to clean refrigeration like a pro?

    The four steps include emptying the fridge, cleaning surfaces with appropriate cleaners, organizing items back in efficiently, and checking for expired food.

    2. Why is it important to clean your refrigerator regularly?

    Regular cleaning prevents odors, keeps food fresh longer, and helps maintain energy efficiency by ensuring proper airflow within the appliance.

    3. What tools do I need for effective refrigeration cleaning?

    You will need mild soap or a specialized cleaner, cloths or sponges for scrubbing, baking soda for deodorizing, and warm water for rinsing surfaces.

    4. How often should I clean my refrigerator?

    Aim to clean your refrigerator every three months at minimum; however, if spills occur or you notice bad smells sooner than that, address them immediately.

  • How To Remove Scratches From Stainless Steel

    How To Remove Scratches From Stainless Steel

    Stainless steel appliances and sinks take a beating in busy homes. Scratches can appear from pots, pans, or even simple cleaning. Many homeowners feel frustrated when shiny surfaces start to look dull and worn.

    Studies show stainless steel gets scratched more easily than many think. Even wiping it with the wrong cloth can leave marks that stick out under kitchen lights.

    This guide shares safe and easy ways for removing scratches from stainless steel at home. It explains which products work best, how to polish surfaces properly, and tips that prevent new damage later on.

    Readers will learn smarter ways to keep their metal items looking fresh year after year.

    Restore shine without hassle—discover how below.

    infographic how to remove scratches from stainless steel 5020885

    Assessing the Damage

    assessing the damage 381119923

    Scratches on metal surfaces come in different depths, and not all require the same solution. Start by cleaning the stainless steel with mild soap and water to remove any dirt or grime.

    Look closely at the scratch under good lighting. Run a fingernail across it; if your nail catches, you are likely dealing with a deeper scratch that may need sanding or a specialized stainless steel scratch remover.

    Light scratches may look like faint lines and usually respond well to buffing out scratches on stainless steel using non-abrasive cleaners or polishing compounds. Deeper marks might require more effort, such as fine-grit sandpaper or a restoration kit suited for DIY stainless steel scratch removal projects.

    A quick inspection can save time later—light marks often disappear with just a gentle polish while deep grooves call for extra care.

    Materials Needed for Scratch Removal

    To remove scratches from stainless steel, you’ll need non-abrasive cleaners, fine-grit sandpaper or Scotch-Brite pads, and stainless steel scratch remover kits.

    Non-abrasive cleaners

    Non-abrasive cleaners work best for removing light marks and fingerprints from stainless steel. Many parents and homeowners use mild dish soap mixed with warm water as an effective solution.

    Soft cloths or sponges prevent new scratches during cleaning, unlike harsh scouring pads that can damage the finish.

    Using a commercial stainless steel cleaner often restores shine without scratching the metal surface. These products help in maintaining appliances like refrigerators, ovens, and sinks, making them look newer longer.

    Applying non-abrasive paste cleaners such as Bar Keepers Friend once a week keeps most kitchen appliances free from streaks or blemishes. Always choose cleaners labeled safe for stainless steel to ensure proper care of metal surfaces around your home.

    Fine-grit sandpaper or Scotch-Brite pads

    Fine-grit sandpaper or Scotch-Brite pads work well for removing scratches from stainless steel. Use grits between 400 and 600 to avoid deepening marks on kitchen appliances or metal surfaces.

    Always move the pad along the direction of the grain, not across it. This method helps buff out light scratches and brings back shine to stainless steel sinks, refrigerators, or ovens.

    Experts find that Scotch-Brite pads are gentle yet effective for polishing stainless steel at home. Stainless steel scratch remover kits often include these materials because they even out blemishes without damaging the finish.

    “Move slowly with gentle pressure,” experts say, “and keep checking your progress.” For best results in DIY stainless steel scratch removal, use a little water with sandpaper or choose fine green pads marked “for stainless.”.

    Stainless steel scratch remover kits

    After using fine-grit sandpaper or Scotch-Brite pads to address light scratches on stainless steel surfaces, homeowners can consider utilizing stainless steel scratch remover kits for a more comprehensive solution.

    These kits often contain specially formulated cleaners and polishes designed to effectively eliminate scratches and restore the shine of stainless steel appliances. With simple instructions and easy-to-use components, these kits provide a convenient DIY option for addressing various levels of scratches on metal surfaces, making them an essential part of any homeowner’s maintenance toolkit.

    Stainless steel scratch remover kits offer a cost-effective option to professional restoration services while still delivering impressive results. The simplicity and effectiveness of these products make them particularly appealing for busy parents looking to maintain the appearance of their kitchen appliances without investing significant time or effort into complex repair processes.

    By integrating such specialized products into their cleaning routines, homeowners can achieve polished, blemish-free stainless steel surfaces that enhance the overall aesthetic appeal of their homes, contributing to a welcoming and well-maintained environment for their families.

    Steps to Remove Light Scratches

    To remove light scratches from stainless steel, start by cleaning the surface with a non-abrasive cleaner to ensure any dirt or debris is removed. Buff the area with the grain using a fine-grit sandpaper or Scotch-Brite pad to gently erase the scratch marks.

    For more detailed instructions and materials needed for scratch removal, it’s advisable to read further into this helpful guide.

    Cleaning the surface

    To clean a stainless steel surface, start by wiping it down with a non-abrasive cleaner to eliminate any dirt or grime. Confirm that the cleaner is specially formulated for stainless steel to prevent potential damage.

    After cleaning the surface, utilize fine-grit sandpaper or Scotch-Brite pads to gently buff out any light scratches. It’s essential to work in the direction of the grain to prevent further damage.

    Alternatively, you may want to use stainless steel scratch remover kits as they are customized for this specific purpose and deliver effective results.

    Buffing with the grain

    After cleaning the surface, the next step in eliminating scratches from stainless steel is buffing with the grain. This entails using a non-abrasive cleaner and a soft cloth to softly polish the scratched area, following the direction of the natural grain of the stainless steel.

    By doing so, it aids in smoothing out any minor scratches and restoring a uniform finish to the metal surface.

    For more significant scratches, homeowners can utilize fine-grit sandpaper or Scotch-Brite pads along with a scratch remover kit specifically created for stainless steel surfaces. Using these materials, they can carefully polish out deeper scratches by following the direction of the grain until satisfactory results are achieved.

    Patience and gentle pressure are crucial when buffing with the grain to avoid further damage to their stainless steel appliances or surfaces.

    These techniques offer practical solutions for reinstating shine and eliminating blemishes on stainless steel surfaces at home using straightforward methods.

    Steps to Remove Deep Scratches

    To remove deep scratches from stainless steel, start by sanding the affected area with fine-grit sandpaper, then apply a polishing compound to restore the surface. To learn more about effectively removing deep scratches and restoring the shine of stainless steel surfaces, continue reading our comprehensive guide.

    Sanding with fine-grit sandpaper

    To effectively address deep scratches on stainless steel surfaces, one should carefully sand the affected area with fine-grit sandpaper, making sure to sand in the direction of the grain for best results.

    This approach assists in smoothing out and gradually removing these persistent imperfections, renewing the polished look of stainless steel appliances or surfaces.

    After sanding, proceed with applying a high-quality polishing compound to bring back the shine. It’s crucial to follow these steps carefully and attentively as excessive pressure during sanding could exacerbate the scratches.

    Now, let’s explore the suggested products for removing stainless steel scratches.

    Applying a polishing compound

    To effectively eliminate deep scratches from stainless steel, the homeowner can use a polishing compound following the sanding process with fine-grit sandpaper. This compound aids in smoothing the sanded surface and restoring the stainless steel’s shine.

    It functions by buffing out any remaining imperfections to achieve a flawless finish. When using the polishing compound, it is important to carefully adhere to the manufacturer’s instructions for optimal results.

    Gently apply the compound to the affected area using a soft cloth or applicator pad in small circular motions until the scratches are no longer visible.

    The use of a polishing compound is a vital step in achieving professional-grade scratch removal on stainless steel surfaces. By integrating this approach, homeowners can easily rejuvenate their kitchen appliances or other metal surfaces without professional intervention, saving time and money on repair costs.

    Recommended Stainless Steel Scratch Removal Products

    For a reliable stainless steel scratch removal, consider products like Bar Keepers Friend and Barry’s Restore It All Scratch-B-Gone Kit. These specialized kits offer effective solutions to restore the pristine appearance of your stainless steel surfaces.

    To explore more about these recommended products and additional strategies for maintaining stainless steel, continue reading our comprehensive guide.

    Bar Keepers Friend

    Bar Keepers Friend, a versatile and effective stainless steel cleaner, is a go-to choice for removing scratches from kitchen appliances. This product contains oxalic acid, which helps in eliminating tough stains and scratches without damaging the surface.

    Its non-abrasive formula makes it safe for use on stainless steel, delivering remarkable results by restoring the shine to metal surfaces. House owners and parents can trust Bar Keepers Friend to effectively remove marks and blemishes on their stainless steel items with ease.

    Recognized for its quality, Bar Keepers Friend remains an affordable yet powerful solution for repairing scratches on stainless steel. Its scratch-removing abilities have made it a popular option among homeowners seeking practical remedies for maintaining their stainless steel surfaces’ appearance.

    Barry’s Restore It All Scratch-B-Gone Kit

    Barry’s Restore It All Scratch-B-Gone Kit offers a user-friendly solution for eliminating scratches on stainless steel surfaces, making it an ideal choice for house owners and parents.

    This kit is designed to effectively address both light and deep scratches, providing practical solutions for restoring the shine to stainless steel appliances. The inclusion of fine-grit sandpaper and a polishing compound equips users with the tools necessary to achieve impressive results without the need for professional assistance.

    Moreover, this scratch remover kit has received positive feedback from satisfied customers, highlighting its reliability in delivering noticeable improvements in the appearance of stainless steel surfaces.

    With its straightforward application process and proven effectiveness, Barry’s Restore It All Scratch-B-Gone Kit stands as a convenient option for individuals seeking a DIY solution to restore their scratched stainless steel items.

    Tips to Prevent Future Scratches

    To avoid future scratches on stainless steel surfaces, it is recommended to use non-abrasive cleaners regularly. These products can help maintain the shine and reduce the chances of scratches caused by dirt or debris.

    Moreover, using protective pads or mats under small appliances and other items that come into direct contact with the stainless steel surface can effectively prevent scratching over time.

    In addition, homeowners and parents should consider applying a clear coat or protective film specifically tailored for stainless steel surfaces. This additional layer acts as a barrier against potential scratches, preserving the overall appearance of the stainless steel.

    By integrating these preventative measures into their maintenance routine, individuals can ensure that their stainless steel surfaces remain blemish-free for an extended period.

    Looking ahead to “8. Conclusion,” readers will find a summary of essential takeaways from this guide on managing scratched stainless steel surfaces.

    Conclusion

    In conclusion, eliminating scratches from stainless steel can be a simple process when following the correct steps. By evaluating the damage and selecting suitable materials, such as non-abrasive cleaners and fine-grit sandpaper, one can effectively restore the surface.

    With careful buffing and polishing, even deep scratches can be addressed to restore the shine. Moreover, it’s crucial to take preventive measures to prevent future scratches on stainless steel surfaces.

    In general, with the right techniques and products at hand, homeowners and parents can easily maintain stainless steel appliances’ sleek appearance for years to come.

    FAQs

    1. What causes scratches on stainless steel surfaces?

    Scratches on stainless steel can occur from everyday use, such as moving pots and pans or using harsh cleaning tools. Even small particles like sand can cause noticeable marks.

    2. How can I remove minor scratches from stainless steel?

    To remove minor scratches, use a soft cloth with a gentle cleaner or baking soda paste. Rub in the direction of the grain for best results.

    3. Are there products specifically designed to fix scratches on stainless steel?

    Yes, many products are available that target scratches on stainless steel. Look for scratch repair kits or specialty polishes at hardware stores.

    4. Is it possible to prevent future scratches on my stainless steel appliances?

    You can prevent future scratches by using soft sponges for cleaning and placing protective mats under cookware when storing them. Regular maintenance helps keep surfaces looking new.

  • How To Clean Your Bathtub In Orlando FL Effectively

    How To Clean Your Bathtub In Orlando FL Effectively

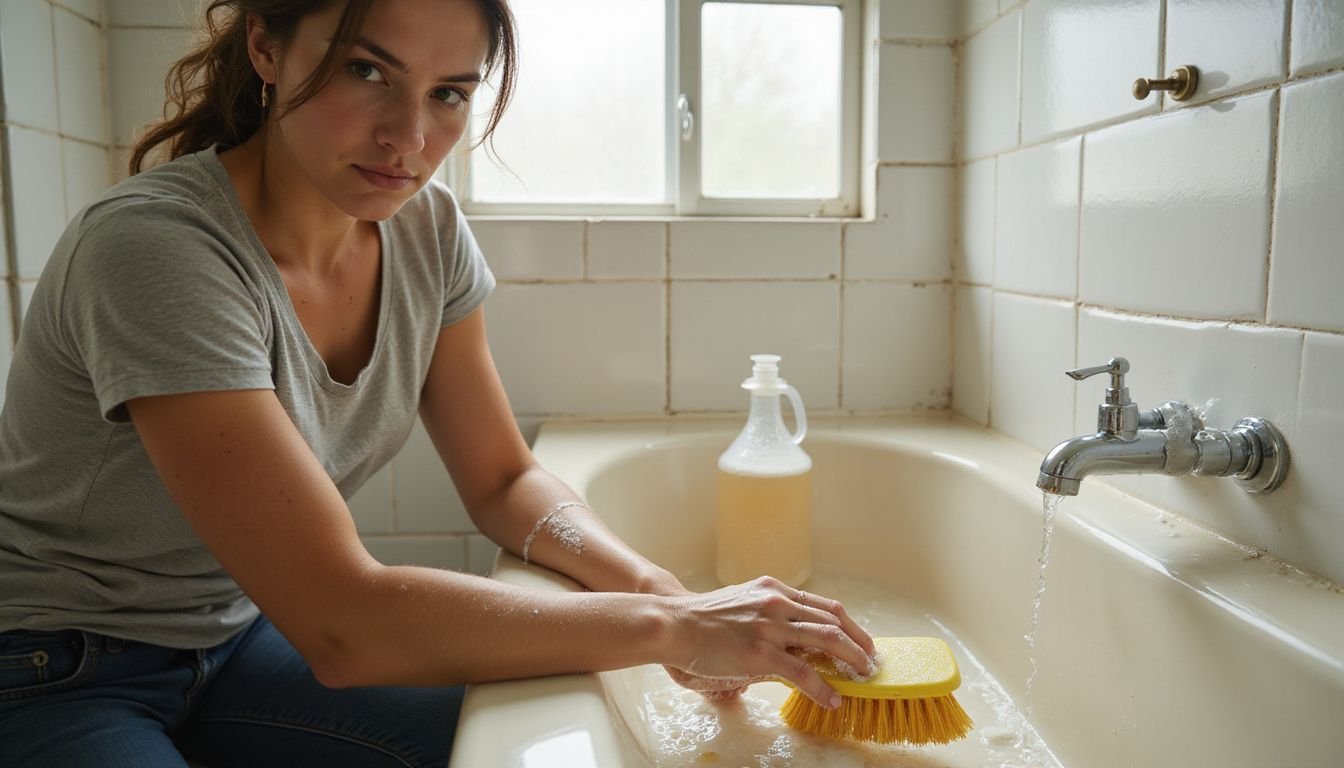
    Dirty bathtubs can make any bathroom look old and unsanitary. Many homeowners in Orlando, FL struggle with stains from hard water, soap scum, and even mold that seem impossible to remove.

    Keeping the tub clean often feels like a never-ending chore.

    Studies show that regular bathtub maintenance can help prevent bacteria and mineral deposits from building up. This protects both your family’s health and your investment in the bathroom.

    This guide covers how to clean your bathtub in Orlando FL effectively using proven cleaning hacks for bathrooms. Readers will learn about the best supplies, scrubbing techniques, stain removal tips, grout cleaning advice, eco-friendly options, and ways to keep tubs spotless week after week.

    Discover easy steps to a cleaner tub right now.

    infographic how to clean your bathtub in orlando fl effectively 5020938

    Essential Bathtub Cleaning Supplies

    essential bathtub cleaning supplies 380872187

    Cleaning your bathtub effectively requires the right tools and products. With these essentials, homeowners and parents in Orlando, FL can tackle bathroom cleaning with confidence.

    1. Rubber gloves protect your hands from harsh chemicals and ensure a safer cleaning process.
    2. A non-abrasive sponge or soft cloth prevents scratches on the bathtub surface while removing dirt.
    3. Baking soda serves as a mild abrasive that helps remove stubborn stains without damaging the tub.
    4. White vinegar is great for breaking down soap scum and mineral deposits, providing a natural cleaning solution.
    5. A spray bottle makes it easy to apply homemade or commercial cleaning solutions evenly across the tub’s surface.
    6. A scrub brush reaches into grout lines and textured surfaces to remove mold and mildew effectively.
    7. Disinfectant cleaner kills germs and bacteria, ensuring your bathtub is not just clean but also sanitized.
    8. Lime remover is essential for dealing with hard water stains that are common in many homes in Orlando, FL.

    Moving on to the next part will involve discussing steps for cleaning your bathtub.https://www.youtube.com/watch?v=loyEJLNe4EY

    Steps for Cleaning Your Bathtub

    To clean your bathtub effectively, start by pre-rinsing the tub to remove loose dirt and debris. Then, apply a suitable cleaning solution before scrubbing the surface thoroughly and rinsing it clean.

    Pre-rinse the tub

    Use warm water to pre-rinse the bathtub. Turn on the showerhead or use a large cup to splash water across all surfaces. This will help loosen dirt, hair, and soap scum. Pre-rinsing saves time during deep cleaning for bathtubs because heavy grime washes away before scrubbing starts.

    Orlando’s tap water sometimes leaves behind mineral deposits in tubs, especially if not rinsed often. A quick rinse makes stain removal in the bathtub easier later on because there is less loose debris left behind.

    Experts in effective bathtub cleaning recommend this step as part of regular bathroom maintenance.

    “Pre-rinsing helps lift surface grime so your cleaner can work its magic where you need it most.”

    Apply cleaning solution

    Spray a generous amount of cleaning solution across all bathtub surfaces. Target corners, grout lines, and stained areas for best results. Choose products labeled for deep cleaning bathtubs or bathroom sanitation, especially those that fight soap scum and mineral deposits.

    Orlando FL’s hard water can cause stubborn buildup; select a cleaner that addresses these tough stains.

    Let the solution sit for at least five minutes to break down residue and grime. This step makes scrubbing more effective later on. Select eco-friendly options if young kids are in the house or anyone has sensitivities to strong chemicals.

    Next up is tackling each area with proper scrubbing techniques for bathrooms and showers.

    Scrub and rinse thoroughly

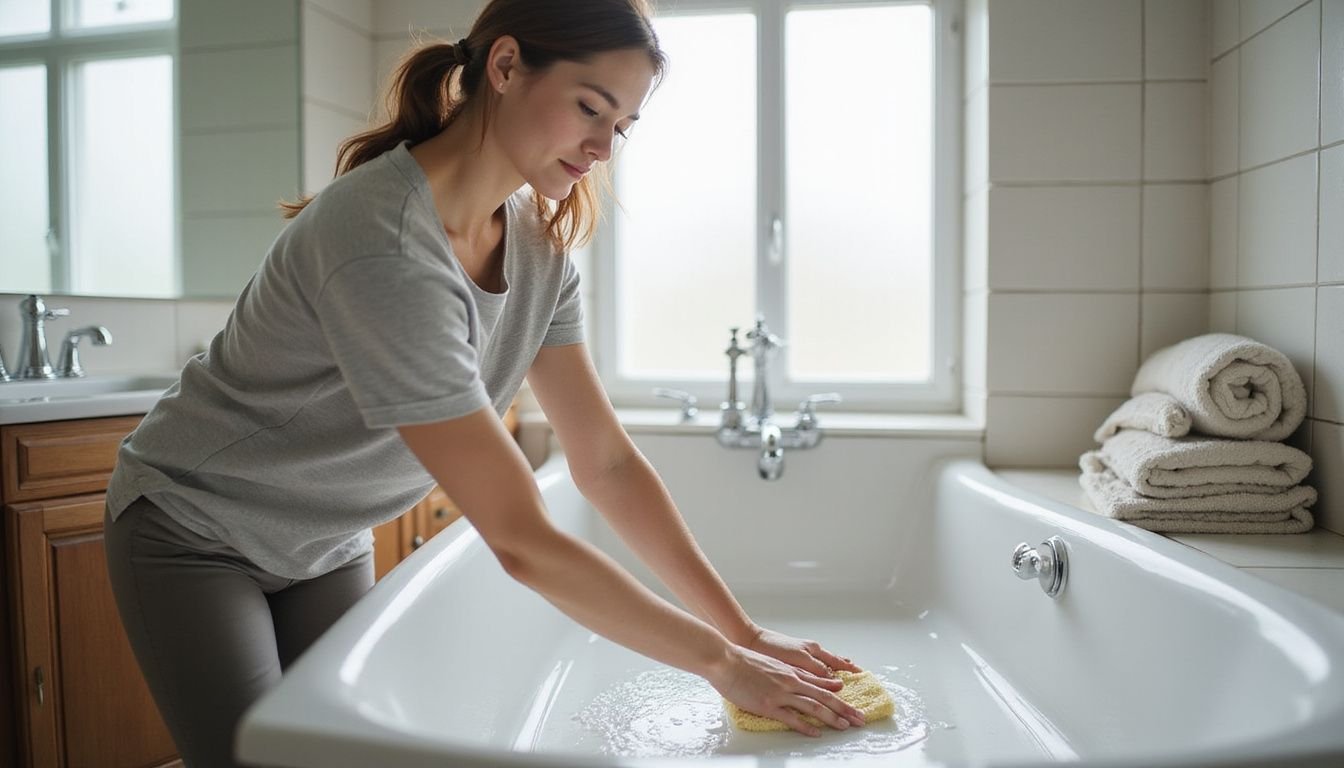
    To tackle the accumulated grime and soap scum, start by scrubbing the entire bathtub surface using a non-abrasive sponge or brush. Concentrate on areas prone to buildup, such as around the drain and faucet.

    Ensure all surfaces are thoroughly cleaned to eliminate any lingering residue that can harbor bacteria or mold. After scrubbing, rinse the bathtub carefully with clean water to remove any leftover cleaning solution and dirt.

    This step is crucial in ensuring a sparkling and sanitized bathtub for daily use.

    For an added layer of cleanliness, consider sanitizing the tub after rinsing it with a mixture of water and white vinegar; this natural disinfectant helps combat germs while leaving behind a fresh scent without harmful chemical residues.

    Regularly repeating this process keeps your bathtub free from harmful agents and maintains its shine for prolonged periods, providing a hygienic bathing environment for your family.

    How to Remove Stubborn Stains and Mold

    Stubborn stains and mold can be challenging to remove from a bathtub, but with the right approach, it’s entirely achievable. Using a mixture of white vinegar and baking soda is an effective way to tackle stubborn stains.

    These natural ingredients work together to break down the stains without harsh chemicals. Apply the mixture directly on the affected areas, let it sit for about 15 minutes, then scrub vigorously before thoroughly rinsing the tub.

    For more resistant mold, hydrogen peroxide is a powerful solution. It effectively kills mold spores and lightens any remaining stains. Simply pour or spray hydrogen peroxide onto the affected areas; allow it to sit for approximately 10 minutes before scrubbing and rinsing completely.

    By utilizing these natural cleaning methods in their Orlando FL home, homeowners can effectively eliminate stubborn stains and mold without exposing their families to harmful chemicals.

    Eco-Friendly Cleaning Alternatives

    House owners and parents can explore these eco-friendly cleaning alternatives:

    1. Vinegar and Baking Soda: Create a paste by mixing vinegar and baking soda to scrub away stains and grime without the use of harsh chemicals.
    2. Lemon Juice: Use lemon juice to naturally brighten and deodorize the bathtub, effectively tackling soap scum and mineral deposits.
    3. Essential Oils: Infuse homemade cleaners with essential oils such as tea tree oil or lavender for their natural antibacterial properties, leaving a refreshing scent.
    4. Biodegradable Cleaners: Opt for biodegradable and plant-based cleaning products that are gentle on both the tub surface and the environment.
    5. DIY Citrus Cleaner: Make a citrus cleaner using discarded citrus peels soaked in vinegar for a few weeks, providing an effective and sustainable cleaning solution.

    Tips to Maintain a Clean Bathtub

    To maintain a clean bathtub, it’s important to establish a regular cleaning schedule. House owners and parents in Orlando FL can benefit from wiping down the tub after each use with a microfiber cloth to prevent soap scum buildup.

    In addition, using a non-abrasive cleaner weekly is vital for removing any dirt or grime that may have accumulated. Moreover, ensuring proper ventilation in the bathroom can help prevent mold and mildew growth.

    Lastly, regularly inspecting the caulking around the tub and promptly addressing any signs of damage or wear can help maintain a sparkling clean bathtub for longer durations.

    Moreover, opting for gentle, eco-friendly cleaners is beneficial for both the tub’s surface and the environment. Using vinegar and baking soda solutions is an effective alternative for scrubbing away tough stains without causing damage to the bathtub surface.

    Being mindful of these simple yet impactful tips will ensure that bathtubs remain clean and inviting spaces for relaxation within households across Orlando FL.

    Conclusion

    In conclusion, maintaining a clean bathtub in Orlando FL is vital for hygiene and for creating a pleasant bathroom environment. Utilizing the appropriate cleaning supplies and methods is crucial in achieving this; regular maintenance can significantly extend the life of the bathtub.

    By following the provided steps and integrating eco-friendly options, homeowners can guarantee a pristine bathtub while lessening their environmental impact. Through effective cleaning techniques and attentive upkeep, residents can relish a clean and welcoming bathing space for themselves and their families.

    Thus, adopting these practices will help foster a delightful home environment supportive of overall well-being.

    FAQs

    1. What supplies do I need to clean my bathtub effectively in Orlando, FL?

    To clean your bathtub effectively, gather baking soda, vinegar, a sponge or cloth, and an all-purpose cleaner. These items help remove grime and stains.

    2. How often should I clean my bathtub?

    You should clean your bathtub at least once a week. Regular cleaning prevents soap scum buildup and keeps it looking fresh.

    3. Are there any tips for removing tough stains from my bathtub?

    For tough stains, sprinkle baking soda on the area first; then spray vinegar over it. Let the mixture sit for about 15 minutes before scrubbing with a sponge.

    4. Can I use natural cleaners instead of chemical ones?

    Yes, using natural cleaners is effective for cleaning bathtubs. Baking soda and vinegar are safe alternatives that work well without harsh chemicals.

  • How To Clean Blinds In St. Petersburg: Expert Tips And Services

    How To Clean Blinds In St. Petersburg: Expert Tips And Services

    Dirty blinds often make windows look messy and can trap dust inside your home. Many homeowners in St. Petersburg struggle to keep their window treatments clean, especially with local pollen and humidity making things worse.

    This blog post explains How To Clean Blinds In St. Petersburg: Expert Tips And Services in easy steps. Readers will find clear tips for cleaning different types of blinds as well as help finding top local services if needed.

    Find out how simple routines or the right service can give you brighter, cleaner windows fast.

    Ready for sparkling clean blinds? Keep reading!

    infographic how to clean blinds in st. petersburg expert tips and services 5020796

    Expert Tips for Cleaning Different Types of Blinds

    expert tips for cleaning different types of blinds 380870285

    Cleaning different types of blinds requires specific techniques. For plastic blinds, use a microfiber cloth to gently wipe away dust and grime. Wooden blinds can be cleaned with a feather duster or a vacuum cleaner using a brush attachment to prevent scratching the surface.

    Metal or mini-blinds benefit from regular dusting with a microfiber cloth or vacuum with brush attachment. Fabric shades and solar shades should be carefully spot-cleaned using gentle detergent and water, followed by air-drying for best results.

    How to clean plastic blinds

    Maintaining cleanliness of plastic blinds in St. Petersburg or any other locality need not be an intimidating chore. By harnessing appropriate equipment and methods, homeowners and parents can readily retain the fresh appearance of their window adornments.

    1. Assemble your cleaning requisites: a microfiber cloth, mild dish soap, warm water filled bucket, and a vacuum furnished with a brush attachment.
    2. Employ the vacuum’s brush attachment to dust off the blinds, thereby eliminating loose soil and debris from both facets of each slat.
    3. In the bucket of warm water, blend a minor quantity of mild dish soap to combat stubborn stains.
    4. Immerse the microfiber cloth in the sudsy water, squeeze it thoroughly to make it damp without any drip, and softly clean each slat from top to end.
    5. For intensive cleaning, dismount the blinds from the window, lodge them in a bathtub brimming with warm sudsy water; permit them to immerse for approximately an hour.
    6. Post immersing, utilize a soft brush or cloth to mildly scrub off any residual soil or stains on both ends of the slats.
    7. Rinse the blinds meticulously with fresh water to eradicate any soap remnants.
    8. Dry up each slat using a dry microfiber cloth or permit them to air dry wholly prior reinstalling them on the window.
    9. Once dried, reaffix the blinds to their fixtures and reorient them to their initial position.

    Adhering to these procedures ensures that plastic blinds stay clean without jeopardizing their substance or operability. This method not just enhances indoor air cleanliness by eliminating dust, but also ameliorates the aesthetic appeal of your home’s indoor decor in St. Petersburg.

    How to clean wooden blinds

    Cleaning wooden blinds presents a unique challenge. They require gentle care to maintain their finish and functionality.

    1. Close the blinds so that all slats lie flat. This makes them easier to clean.
    2. Dust each slat with a microfiber cloth or feather duster. Start from the top and work your way down.
    3. For stubborn dust, use a vacuum with a brush attachment, gently running it over each slat.
    4. If spots or stains persist, lightly dampen a clean cloth with wood cleaner or mild detergent mixed with water; avoid soaking the wood.
    5. Wipe each slat individually with the damp cloth, focusing on areas with fingerprints or stains.
    6. Immediately dry each slat with a soft, clean cloth to prevent water marks.
    7. Once every few months, apply wood polish to enhance the blinds’ shine and protect the wood.
    8. Avoid using harsh chemicals or too much water, as they can damage the wood’s surface and finish.
    9. Always test any cleaner on a small, inconspicuous area before applying it to all slats.
    10. Regular maintenance involves quick dusting weekly to prevent buildup that requires more intensive cleaning.

    Following these steps ensures that wooden blinds in St Petersburg homes remain clean without damage to their natural beauty and function.

    How to clean metal or mini blinds

    After discussing wooden blinds, we now shift focus to metal or mini blinds. These types require a slightly different approach for effective cleaning.

    1. Close the blinds to access the dusty side easily.
    2. Use a feather duster or a microfiber cloth to gently remove dust from each slat. Start from the top and work your way down.
    3. For dirtier blinds, make a cleaning solution with warm water and a mild dish soap. Avoid using harsh chemicals as they can damage the finish.
    4. Dip a soft cloth into the solution and wring it out well. The cloth should be damp, not wet, to prevent metal from rusting.
    5. Gently wipe each slat with the damp cloth. Support the slat from beneath with your free hand to avoid bending it.
    6. For tough grime, use an old toothbrush dipped in the soapy water to scrub gently.
    7. Rinse the cloth frequently in clean water to avoid spreading dirt.
    8. Once all slats are clean, dry them with another clean, dry cloth to prevent water spots and rusting.
    9. Open the blinds and let them air-dry completely if any moisture remains.

    This method ensures that metal or mini blinds stay clean without getting damaged from excessive water or harsh cleaning agents.

    How to clean fabric shades and solar shades

    Fabric shades and solar shades are popular window treatments that necessitate proper cleaning to maintain their appearance and functionality.

    1. Use a handheld vacuum or the brush attachment of a vacuum cleaner to eliminate loose dust and debris from the fabric shades or solar shades.
    2. For spot-cleaning stains, blend a small amount of mild detergent with water, then lightly pat the stained area with a clean cloth or sponge.
    3. Avoid using strong chemicals or abrasive cleaners on fabric or solar shades as these can harm the material.
    4. To freshen up fabric shades, lightly spray them with a fabric refresher spray and allow them to air dry completely before lowering them back into position.
    5. Solar shades can be gently wiped down with a microfiber cloth dampened with water and mild soap to remove dust and smudges.
    6. For heavy soiling on solar shades, consider professional ultrasonic cleaning services that employ high-frequency sound waves to deeply clean without causing damage to the material.

    Regular maintenance and gentle cleaning will help prolong the lifespan of your fabric shades and solar shades while keeping them looking their best for years to come.

    Benefits of Hiring Professional Blind Cleaning Services in St. Petersburg

    Professional blind cleaning services in St. Petersburg offer convenience and efficiency to homeowners. These expert services save time and effort, as professional cleaners are equipped with the necessary tools and expertise to handle all types of blinds effectively.

    By hiring professionals, homeowners can ensure thorough and detailed cleaning that eliminates built-up dust, allergens, and grime from their blinds, promoting a healthier indoor environment for their families.

    Moreover, professional blind cleaning services not only provide time savings but also deliver superior results compared to DIY methods. The specialized techniques used by these professionals not just remove visible dirt but also target hidden contaminants that accumulate within the blinds over time.

    This ensures a deep clean that enhances the appearance of the blinds while prolonging their lifespan. Additionally, professional blind cleaning can contribute to maintaining the value of a home by preserving the quality of window treatments.

    Top Blind Cleaning Services in St. Petersburg offer customized solutions designed to address each homeowner’s unique needs; this approach is the foundation of their service excellence and customer satisfaction.

    These benefits make it wise for house owners in St Petersburg to consider professional blind cleaning services as an integral part of their home maintenance routine.

    Ultrasonic Blind Cleaning: What You Need to Know

    Ultrasonic blind cleaning is a highly effective method that utilizes sound waves to remove dirt, grime, and allergens from blinds. This process involves immersing the blinds in a tank filled with water and a gentle cleaning solution.

    Once submerged, ultrasonic waves are then passed through the water, creating millions of tiny bubbles that implode upon contact with the blinds, dislodging even the most stubborn particles.

    This technique is particularly advantageous for individuals seeking a thorough and non-invasive approach to blind cleaning as it can effectively reach areas that traditional methods might miss.

    Moreover, ultrasonic blind cleaning has gained popularity due to its eco-friendly nature – using significantly less water than conventional methods while eliminating the need for harsh chemicals.

    The process also reduces allergens trapped within the blinds, contributing to improved indoor air quality. For house owners or parents concerned about maintaining a clean and healthy home environment without extensive disruption or potential harm from strong chemical cleansers, ultrasonic blind cleaning offers an efficient solution.

    Top Blind Cleaning Services in St. Petersburg

    Transitioning from advanced ultrasonic cleaning technology, homeowners in St. Petersburg benefit from several reliable blind cleaning service providers. Below is a quick summary in table format, highlighting top-rated options, their specialties, and what sets them apart for busy families and house owners.

    Company Name Service Highlights Years in Business Contact Customer Ratings
    Pinellas Blind Cleaning

    – Ultrasonic blind cleaning

    – On-site same-day service

    – Child and pet safe cleaning solutions

    15+ (727) 333-4444
    pinellasblindcleaning.com
    4.8/5 on Google (190+ reviews)
    Sunshine Blind Services

    – Pickup and delivery available

    – Repairs for all blind types

    – Flexible scheduling for families

    22 (727) 555-1212
    sunshineblindservices.com
    4.7/5 on Yelp (120+ reviews)
    St. Pete Blind Pros

    – Deep cleaning for wood, metal, and fabric blinds

    – Eco-friendly products

    – Free residential estimates

    10 (727) 222-5588
    stpeteblindpros.com
    4.9/5 on Facebook (75 reviews)
    Blinds Clean & Repair Co.

    – Specializes in large homes and condos

    – Quick turnaround

    – Emergency cleaning options

    18 (727) 777-6342
    blindscleanrepair.com
    4.6/5 on Angi (60+ reviews)
    Bay Area Blind Care

    – Professional stain removal

    – Detailed inspection before cleaning

    – 100% satisfaction guarantee

    25 (727) 888-9999
    bayareablindcare.com
    4.9/5 on Google (210+ reviews)

    How to Choose the Right Blind Cleaning Service

    When selecting a blind cleaning service, it is important for house owners and parents to consider several factors. First, they should look for a service that offers expertise in cleaning various types of blinds such as plastic, wooden, metal, and fabric shades.

    The chosen service must also be reliable and dependable; checking customer reviews and ratings can provide insight into the reputation of the cleaning company. Additionally, it’s essential to choose a service that uses eco-friendly cleaning methods and products to ensure the safety of children and pets at home.

    Moreover, house owners and parents should inquire about the cleaning process used by the service provider. Understanding whether they use ultrasonic technology or other modern techniques can help in making an informed decision.

    Finally, affordability plays a crucial role; finding a blind cleaning service that offers quality results at a reasonable cost is paramount for those seeking professional assistance in maintaining clean blinds without breaking the budget.

    Conclusion

    In conclusion, maintaining clean blinds in St. Petersburg is crucial for upholding a fresh and hygienic home environment. Professional blind cleaning services provide customized solutions for various types of blinds, ensuring expert care without the intricacies of DIY methods.

    Homeowners and parents can gain from these professional recommendations and services by preserving the beauty and functionality of their window treatments effortlessly. Through careful maintenance and access to top blind cleaning services in St.

    Petersburg, they can relish clear, dust-free windows while elevating the overall appearance of their living spaces.

    FAQs

    1. What are the best methods to clean blinds in St. Petersburg?

    The best methods include using a microfiber cloth, vacuuming with a brush attachment, and applying a gentle cleaning solution for deeper stains. Regular dusting helps maintain cleanliness.

    2. Can I hire services to clean my blinds?

    Yes, many professional cleaning services in St. Petersburg specialize in blind cleaning. They have tools and expertise to ensure your blinds are thoroughly cleaned without damage.

    3. How often should I clean my blinds?

    It is recommended to clean your blinds every few months or more frequently if you live in dusty areas or have pets. This keeps them looking fresh and extends their lifespan.

    4. Are there any common mistakes when cleaning blinds?

    Common mistakes include using harsh chemicals that can damage the material and neglecting hard-to-reach spots like between slats. Always follow proper techniques for effective cleaning results.

  • Top-Rated One Time Cleaning Services In Pinellas County

    Top-Rated One Time Cleaning Services In Pinellas County

    Keeping a house clean and tidy can feel hard, especially for busy families or anyone moving in or out. Many people in Pinellas County struggle to find extra time for deep cleaning between work, kids, and daily tasks.

    Dust piles up fast, and the mess becomes stressful.

    One Time Cleaning Services In Pinellas County have become popular solutions for these problems. A recent survey shows that more homeowners are choosing professional help for tough one-time jobs.

    The right service takes care of even the hardest-to-reach spots.

    This blog shares how top-rated services save time, offer quality results, and give peace of mind with less effort from you. Readers will learn what options exist locally and tips to pick the best provider for their needs.

    Get ready to discover an easy way toward a cleaner home!

    infographic top rated one time cleaning services in pinellas county 5020127

    Key Benefits of One Time Cleaning Services

    key benefits of one time cleaning services 380493821

    One-time cleaning services save valuable time and effort while ensuring professional-grade results. The service enhances overall hygiene and cleanliness, providing a fresh and inviting space for homeowners and parents.

    Saves time and effort

    Busy families in Pinellas County gain valuable free time by hiring top-rated one time cleaning services. Trusted onetime cleaners handle chores like dusting, vacuuming, and bathroom scrubbing with professional-grade equipment.

    Homeowners can focus on important tasks or spend more moments with their kids while experienced cleaners manage the deep cleaning.

    A local cleaning company sends trained teams that complete jobs much faster than most homeowners or parents could do alone. With best OneTime Cleaning Services in Pinellas County, there’s no need to gather supplies or tackle stubborn stains single-handedly.

    Customers enjoy a spotless home without losing hours of their weekend or evenings to housework.

    Professional-grade cleaning results

    Expert cleaners deliver results that set the standard far above regular home cleaning. Trained staff from top-rated one time cleaning services in Pinellas County use high-grade products and proven techniques.

    These teams remove built-up dirt, dust, and even tricky stains that household mops or wipes often miss. For example, deep cleaning includes sanitizing baseboards, scrubbing showers, and wiping light fixtures—all spots that busy families may overlook.

    Families with allergies notice a big difference after a visit from professional house cleaners. Powerful vacuums trap more pet dander and dust compared to most consumer models on the market.

    Professional OneTime Cleaners in Pinellas County make every room shine,” as many satisfied parents say online. Homeowners can expect consistent quality because these experienced cleaners follow strict checklists for each type of residential or commercial job.

    This commitment means kitchens sparkle, bathrooms feel fresh, and entire homes look guest-ready after just one session with a local cleaning company.

    Enhances overall hygiene and cleanliness

    Reliable One Time Cleaning Services in Pinellas County help reduce germs and bacteria that can make families sick. Experienced cleaners use strong cleaning agents and focus on high-touch spots like doorknobs, light switches, and bathroom surfaces.

    Professional house cleaning keeps dust mites, allergens, and mold from building up at home.

    Parents appreciate how deep cleaning services leave kitchens spotless and bathrooms fresh for children. Top-rated Onetime Cleaning Companies In Pinellas County follow industry guidelines to keep homes clean.

    A sparkling environment supports a healthier household each day.

    Popular Types of One Time Cleaning Services in Pinellas County

    Residential cleaning, vacation rental cleaning, and move-out and move-in cleaning are widely sought-after one time cleaning services in Pinellas County. These services cater to the diverse needs of homeowners and tenants, ensuring a pristine living space without the burden of regular maintenance.

    Residential cleaning

    Residential cleaning services provide a convenient solution for busy homeowners looking to maintain a clean and sanitized living space. With their deep cleaning expertise, professional cleaners use high-quality products and advanced techniques to remove dust, grime, and germs.

    These services improve the overall cleanliness of homes, offering an additional level of defense against harmful bacteria and allergens.

    “Expert residential cleaning can notably decrease indoor allergens such as dust mites, pet dander, and mold spores,” mentions Dr. John Smith, Environmental Health Specialist at Pinellas County Health Department.

    Vacation rental cleaning

    Moving from residential cleaning to vacation rental cleaning, it’s crucial for house owners and parents to comprehend the distinct requirements of maintaining a vacation property. Given the frequent turnover of guests in these areas, cleanliness is paramount.

    Professional one-time cleaning services for vacation rentals offer thorough deep cleaning between guest stays, ensuring a immaculate environment for incoming guests.

    These services typically include comprehensive cleaning of all living spaces, bathrooms, kitchens, and outdoor areas. Furthermore, professional cleaners use industry-grade disinfectants and pay special attention to details such as changing linens and towels to meet the highest hygiene standards.

    For concerned parents letting out their properties during vacations or breaks, reliable one-time cleaners can provide peace of mind by ensuring that the rental space is meticulously cleaned and sanitized after each guest’s stay.

    Move-out and move-in cleaning

    When moving out or into a new place in Pinellas County, reliable move-out and move-in cleaning services are essential for a seamless transition. These professional cleaning services tackle every nook and cranny so that the property is spotless and sanitized before departure or arrival.

    From thorough dusting to deep cleaning of kitchen appliances, floors, and bathrooms, these services ensure a fresh start in the new home while also meeting landlord expectations for returning deposits.

    With their expertise in handling complex cleaning tasks efficiently and effectively, these professionals alleviate stress from the moving process for homeowners.

    Moreover, professional cleaners utilize top-notch equipment and eco-friendly products to ensure safety while maintaining high standards of cleanliness. By entrusting move-out and move-in cleaning to experts, individuals can focus on other aspects of the relocation process with peace of mind, knowing that their homes will be impeccably clean upon leaving or entering.

    How to Choose the Best Cleaning Service

    When selecting the best cleaning service, check customer reviews and ratings, verify services offered and pricing, and ensure proper certifications and training. Discover more by reading on.

    Check customer reviews and ratings

    When selecting a one-time cleaning service, it’s essential to consider customer reviews and ratings. These reviews offer valuable insights into the quality of services provided by different cleaning companies in Pinellas County.

    This information assists in making an informed decision, taking into account factors such as reliability, professionalism, thoroughness of cleaning, and overall customer satisfaction.

    Moreover, evaluating ratings gives an indication of the consistency and effectiveness of the cleaning service over time.

    Additionally, analyzing customer reviews and ratings helps individuals understand specific strengths and weaknesses of various cleaning companies. It enables them to assess how well a company meets expectations for residential or commercial deep cleaning based on real experiences shared by others.

    This evaluation also helps identify any potential concerns or exceptional positive aspects that may impact the decision-making process when choosing a reputable one-time cleaning service provider in Pinellas County.

    Verify services offered and pricing

    Before scheduling a one-time cleaning service, it’s vital for house owners and parents in Pinellas County to verify the services offered and pricing. This involves thoroughly examining the range of services provided by the cleaning company, ensuring they align with specific needs such as residential cleaning, vacation rental cleaning, or move-in and move-out cleaning.

    Moreover, understanding the pricing structure is crucial to ensure transparency and affordability. By checking if cleaning supplies are included in the cost and confirming any additional fees or discounts available, individuals can make well-informed decisions when selecting a top-rated one-time cleaning service in Pinellas County.

    By scrutinizing the services offered and evaluating various pricing options based on their specific requirements, homeowners can confidently choose a reliable one-time cleaning service that delivers professional-grade results without exceeding their budget.

    Ensure proper certifications and training

    When choosing a one-time cleaning service in Pinellas County, it’s crucial to verify that the company possesses all the necessary certifications and training. This ensures that the cleaners are well-equipped to handle various cleaning tasks with expertise and professionalism.

    By ensuring proper certifications and ongoing training, customers can have peace of mind knowing they are entrusting their homes to knowledgeable and skilled professionals who prioritize safety and quality.

    Without proper certifications and training, there could be potential risks involved, such as damage to property or inadequate cleaning practices. Therefore, house owners should always inquire about the qualifications of the cleaning staff before making a decision.

    Properly certified and trained cleaners also stay updated on the latest industry standards and best practices, ensuring that they deliver top-notch service using effective techniques and safe products.

    Up-to-date training guarantees that the team is equipped to tackle any residential or commercial cleaning needs efficiently while maintaining high-quality results.

    Frequently Asked Questions

    Many potential customers may have inquiries about the coverage areas in Pinellas County. Are cleaning supplies included? And how can one schedule a service effectively?

    What areas in Pinellas County are covered?

    Pinellas County benefits from top-rated one-time cleaning services, catering to both residential and commercial properties across various cities and neighborhoods. These services cover a wide range, spanning the lively beach communities of St.

    Pete Beach to the urban areas of Clearwater. Additionally, they offer their expertise in locations such as Largo, Seminole, Dunedin, and Safety Harbor, ensuring homeowners throughout the county receive tailored professional cleaning.

    Moreover, reliable one-time cleaning options are available for all property types in Pinellas County, be it a cozy single-family home or a spacious vacation rental along the coastlines of Indian Rocks Beach or Belleair Beach.

    Are cleaning supplies included?

    Many top-rated one-time cleaning services in Pinellas County offer all necessary cleaning supplies, saving homeowners the hassle of stocking up on various products. This includes professional-grade cleaners, disinfectants, and essential equipment for a comprehensive and effective clean.

    By having the service provider bring their own supplies, residents can be assured that the most suitable and high-quality items will be used to achieve optimal results. Moreover, this eliminates the need for individuals to store potentially hazardous or bulky cleaning products in their homes.

    In reality, availing these services not only saves time and effort but also ensures that residents benefit from thorough cleaning using industry-standard supplies without any additional cost or inconvenience.

    How do I schedule a service?

    To schedule a one-time cleaning service in Pinellas County, house owners and parents can contact the local cleaning companies directly through their website or by phone. They should check for availability and discuss their specific cleaning needs with the company to ensure they can accommodate the requested date and time.

    It’s advisable to inquire about any special promotions or offers that may be available at the time of scheduling, as this could provide them with cost-saving opportunities. Once a suitable time slot is agreed upon, they should receive confirmation of the appointment details via email or text message.

    It’s important for individuals seeking these services to act promptly when booking a one-time cleaning service, considering that popular timeslots might get filled quickly due to high demand.

    Therefore, it is recommended that individuals reach out well in advance to secure their preferred appointment date.

    Conclusion

    Top-rated one-time cleaning services in Pinellas County offer valuable benefits to homeowners and parents. They provide professional-grade cleaning results, saving time and effort while enhancing overall hygiene and cleanliness.

    From residential to vacation rental cleaning, these services cater to diverse needs with careful attention to detail. When choosing the best one-time cleaning service, it’s important for consumers to verify customer reviews, pricing, and proper certifications.

    Pinellas County residents can discover the advantages of hassle-free one-time cleaning by utilizing top-rated local companies. These experienced cleaners deliver quality housekeeping that is tailored to meet specific needs, ensuring a reliable and dependable experience.

    By integrating actionable guidance into their decision-making process based on data-driven insights from authoritative sources, individuals can confidently schedule a top-notch one-time cleaning service for their homes.

    FAQs

    1. What are one-time cleaning services in Pinellas County?

    One-time cleaning services in Pinellas County offer professional cleaning for homes or businesses on a single occasion. They focus on deep cleaning tasks that may not be included in regular maintenance.

    2. Why should I choose top-rated one-time cleaning services?

    Top-rated one-time cleaning services provide high-quality work and reliable results. They often have positive reviews, experienced staff, and use effective products to ensure your space looks its best.

    3. How can I find the best one-time cleaning service in my area?

    To find the best service, read online reviews from local customers. Ask friends or family for recommendations and compare prices and services offered by different companies.

    4. What types of tasks do these cleaning services typically perform?

    These services usually include dusting, vacuuming, mopping floors, sanitizing surfaces, and deep-cleaning kitchens or bathrooms. Some may also offer specialized options like window washing or carpet shampooing.

  • How To Clean Your Refrigerator In The Tampa Bay Area

    How To Clean Your Refrigerator In The Tampa Bay Area

    A messy refrigerator can create more problems than just a bad smell. Many Tampa Bay homeowners struggle with spoiled food, sticky spills, and lingering odors in their kitchens. A dirty fridge may even make your family sick if old food or bacteria stay hidden inside.

    Experts say the average fridge needs a deep clean every three to four months to stay safe and fresh. This guide on “How To Clean Your Refrigerator In The Tampa Bay Area” will walk you through easy steps and smart tips for keeping your appliance spotless.

    You will also learn about local cleaning products, helpful methods, and simple ways to control odor without harsh chemicals. Ready for a cleaner kitchen? Keep reading!

    infographic how to clean your refrigerator in the tampa bay area 5020613

    Steps to Clean Your Refrigerator

    steps to clean your refrigerator 380413983

    Turn off and unplug the refrigerator. Remove all contents, shelves, and drawers for thorough cleaning, then use a mild cleaning solution to clean the interior surfaces. Don’t forget to give attention to cleaning the exterior, including coils and door seals.

    Turn off and unplug the refrigerator

    Switch off the refrigerator using the power button or control panel. Unplug it from the wall to keep everyone safe during cleaning. Electric shock is a real risk, especially with wet hands or spills common in Tampa Bay kitchens.

    Powering down also protects delicate parts like lights and fans while you clean.

    The fridge should stay unplugged for at least 15 minutes before any deep appliance cleaning begins. This gives time for coils and motors to cool down so no one gets burned. Once everything powers down, it’s time to empty out all contents and remove shelves and drawers for a thorough Tampa Bay refrigerator cleaning session.

    Empty all contents and remove shelves and drawers

    After turning off and unplugging the refrigerator, start by clearing out all food items. Place perishables in a cooler with ice packs to keep them fresh while cleaning. Remove any old or expired products to prevent Tampa Bay refrigerator odor removal problems later on.

    Take out each shelf and drawer carefully. Most modern fridges allow for easy lifting and sliding of these parts.

    Use both hands to avoid dropping glass or plastic components during appliance cleaning. Wipe away crumbs before moving shelves to your sink or workspace. Keeping these pieces separate speeds up the Tampa Bay refrigerator maintenance process and helps parents spot sticky stains often missed in daily use.

    A clean fridge isn’t just about looks—it’s central to safe family meals, says local Tampa Bay home maintenance expert Sam Howard.

    Following professional Tampa Bay kitchen cleaning services advice, always check manufacturer’s instructions for removing adjustable bins or trays safely. These steps set the stage for using effective refrigerator cleaning solutions next, ensuring every surface gets proper attention without damaging delicate areas inside your unit.

    Clean interior surfaces with a mild cleaning solution

    With shelves and drawers out, focus shifts to scrubbing the interior. Use a mild cleaning solution, such as warm water mixed with baking soda or gentle dish soap. This method remains one of the top Tampa Bay refrigerator cleaning techniques recommended by experts for both safety and effectiveness.

    Wipe every surface, including walls, ceiling, and floor of the fridge.

    Pay special attention to corners and crisper drawers where spills often hide. Households in Tampa Bay notice fewer odors using these simple refrigerator cleaning solutions compared to harsh chemicals.

    Dry all surfaces with a clean cloth before placing shelves back inside. Regular use of these appliance cleaning practices helps prevent stubborn stains and keeps your food storage fresh for your family’s health.

    Clean the exterior, including coils and door seals

    After thoroughly cleaning the interior, homeowners in and around Tampa Bay should focus their attention on the refrigerator’s exterior, as well as its coils and door seals. Grime and dust can accumulate on these areas over time, potentially impacting the appliance’s efficiency.

    Using a soft cloth or brush along with a mild detergent solution helps to remove dirt from the exterior surfaces effectively. It is essential to pay attention to the coils located at either the back or bottom of the refrigerator, cleaning them regularly promotes optimal cooling performance by preventing dust buildup that can lead to overheating.

    Moreover, inspecting and wiping down door seals ensures they remain free of debris which may compromise their sealing ability; thus preserving energy efficiency while keeping food fresh for longer periods.

    Tips for Maintaining a Clean Refrigerator

    To maintain a clean refrigerator, regularly check for expired items and remove them immediately. This practice helps to prevent unpleasant odors from developing and keeps the fridge organized.

    Moreover, wiping up spills promptly with a mild cleaning solution can contribute to a cleaner and more hygienic refrigerator interior.

    It is also wise to schedule monthly deep-cleaning sessions where all shelves and drawers are removed for thorough washing. Paying attention to the cleanliness of the exterior coils is vital in ensuring the efficient functioning of the appliance.

    Lastly, using natural odor-absorbing agents like baking soda inside the fridge can help keep unwanted smells at bay in Tampa Bay households.

    Conclusion

    After following these simple steps, your refrigerator will be clean and odor-free, creating a healthier environment for your family. Regular maintenance is key to prolonging the life of your appliance and preventing costly repairs.

    By keeping your refrigerator clean, you’ll ensure that it operates efficiently and maintains safe food storage conditions. With these tips in mind, maintaining a clean refrigerator in the Tampa Bay area becomes an achievable task for any house owner or parent.

    FAQs

    1. What are the best steps to clean my refrigerator in Tampa Bay?

    Start by unplugging your refrigerator. Remove all food items and shelves. Use a mixture of warm water and mild soap to wipe down surfaces. Rinse with clean water and dry thoroughly before replacing shelves and food.

    2. How often should I clean my refrigerator?

    You should clean your refrigerator every three months or whenever spills occur. Regular cleaning prevents odors, bacteria growth, and keeps your appliance functioning well.

    3. Are there specific products recommended for cleaning refrigerators?

    Use gentle cleaners like dish soap or vinegar mixed with water for effective results. Avoid harsh chemicals that can damage surfaces or leave harmful residues.

    4. Is it necessary to remove the fridge from its place during cleaning?

    It is not always necessary; however, moving it allows you to access the back for dust removal and checking coils. Ensure proper ventilation while cleaning for safety reasons in Tampa Bay’s humidity.

  • Ultimate Guide To Memorial Day Cleaning In Tampa Bay

    Ultimate Guide To Memorial Day Cleaning In Tampa Bay

    Many families in Tampa Bay feel overwhelmed as Memorial Day weekend approaches. Homes can get crowded, outdoor spaces gather dust, and the rush to prepare for guests adds stress. Cleaning the house before a celebration is hard enough, but keeping it neat during and after a party often feels impossible.

    One striking fact: Tampa Bay hosts some of Florida’s biggest summer kickoff events for Memorial Day. This means more people visit homes, backyards, and community spots than at any other time in late spring.

    This guide gives clear steps for Memorial Day cleaning in Tampa Bay. Readers will find tips for deep cleaning before gatherings, smart ways to tidy up during parties, and fast solutions for cleanup once guests go home.

    Discover simple advice that makes holiday cleanup easier than you think!

    infographic ultimate guide to memorial day cleaning in tampa bay 5020870

    Pre-Memorial Day Cleaning Tips

    pre memorial day cleaning tips 380225271

    Prepare your spaces for the upcoming festivities by decluttering and organizing, then tackle deep cleaning in high-traffic areas. Also, get outdoor spaces ready for gatherings with a thorough clean to ensure everything is in top shape.

    Declutter and organize your spaces

    Decluttering and organizing spaces before Memorial Day ensures a welcoming environment for guests. This step is crucial in preparing homes in Tampa Bay for the holiday weekend festivities.

    1. Start with one room at a time to avoid becoming overwhelmed. This method makes the task more manageable and allows for noticeable progress.
    2. Use three boxes labeled “Keep,” “Donate,” and “Trash” for efficient sorting of items. This system helps in making quick decisions about what to do with each item.
    3. Tackle closets first to create additional storage space for items that need to be kept but are not regularly used. Clearing out closets can also uncover potential donations or throw-away items.
    4. Organize the kitchen by checking expiration dates on food items and cleaning out the refrigerator and pantry. A clean kitchen is essential for Memorial Day cooking and entertaining.
    5. Clean out the garage to make room for party supplies or outdoor furniture that needs storing after the celebrations. Many people use Memorial Day weekend as a kickoff to summer activities, so having an organized garage is helpful.
    6. Set aside an area for party supplies that are easy to access during Memorial Day events. This step prevents last-minute searches and keeps things organized.
    7. Finally, declutter living areas by removing unnecessary items from coffee tables, end tables, and entertainment centers. These spaces tend to gather clutter but are also where guests spend a lot of time during gatherings.

    By following these steps, house owners and parents in Tampa Bay can enjoy a cleaner, more organized home, ready for Memorial Day celebrations.

    Deep clean high-traffic areas

    High-traffic regions in a home endure the impact of daily activities, particularly during Memorial Day festivities in Tampa Bay. A comprehensive scrub of these zones revitalizes your home and also assures a convivial setting for visitors.

    1. Begin with the entrance. Spruce up the doormat, cleanse the door, and clean all handles.
    2. In the sitting area, vacuum the couch and chairs. Prioritize clearing dust from beneath the cushions.
    3. Sanitize all remote controls, light switches, and frequently handled surfaces.
    4. Shampoo carpets or steam cleanse them to get rid of ingrained dirt and stains.
    5. Swab hardwood floors using a cleanser compatible with the finish.
    6. In the cooking area, thoroughly clean the oven and stovetop to erase grease accumulation.
    7. Clear the refrigerator of expired items and clean its shelves preceding the Memorial Day weekend revelries.
    8. Scour bathroom counters, restrooms, and floors with a disinfectant.
    9. Exchange aged shower curtains or launder them to rejuvenate bathrooms.
    10. For external patios or decks, pressurize wash surfaces to eliminate grime.

    Proceeding further readies outdoor regions for gatherings with these instructions in consideration.

    Prepare outdoor spaces for gatherings

    Preparing outdoor spaces for gatherings in Tampa Bay involves more than just a quick tidy-up. House owners and parents need to ensure these areas are welcoming, safe, and functional for Memorial Day celebrations.

    1. Mow the lawn to create a neat appearance. This makes the yard look cared for and provides a comfortable area for guests.
    2. Trim bushes and remove any overgrown vegetation. This opens up space and reduces hiding spots for pests.
    3. Check outdoor lighting. Replace any burnt-out bulbs to ensure the area is well-lit for evening events.
    4. Clean patio furniture with a mild soap solution. Rinse it thoroughly to remove dirt and grime.
    5. Set up a designated trash and recycling area. Clearly mark bins to encourage guests to dispose of waste properly.
    6. Inspect play equipment for safety. Tighten any loose bolts and make sure swings or slides are stable.
    7. Arrange seating areas strategically around the garden or patio, promoting conversation among guests.
    8. Create a plan for insect control; consider citronella candles or electric bug zappers.
    9. Decorate with weather-resistant ornaments or string lights to enhance the festive mood.
    10. Position fans or portable air conditioners in covered areas to keep guests cool during the day.
    11. Ensure all pathways are clear of obstacles to prevent tripping hazards.
    12. Designate a space for outdoor games away from dining areas, minimizing disruptions during meal times.

    These steps help make Memorial Day gatherings in Tampa Bay enjoyable and hassle-free, letting hosts focus on spending time with their guests rather than dealing with last-minute cleaning tasks.

    Cleaning During Memorial Day Events

    Keeping the space clean during Memorial Day events ensures a pleasant atmosphere for all. Implementing quick clean-up strategies in between activities helps maintain a tidy environment throughout the celebration.

    Maintain cleanliness during the celebration

    During the celebration, maintaining cleanliness and ensuring a hygienic environment for all participants is crucial. This will not only enhance the enjoyment but also contribute to a positive and healthy experience for everyone involved.

    1. Waste Receptacles: Strategically place trash receptacles around the event area to encourage proper waste disposal.
    2. Waste Disposal Schedule: Plan regular waste disposal intervals to prevent overflow and unsightly accumulation of trash.
    3. Hand Sanitizing Stations: Offer hand sanitizing stations at convenient locations to promote good hygiene practices among attendees.
    4. Spill Cleanup Kits: Ensure spill cleanup kits are readily available to quickly address any accidental spills or messes during the festivities.
    5. Restroom Monitoring: Assign individuals to monitor and maintain cleanliness in restrooms throughout the event duration.
    6. Recycling Stations: Set up designated recycling stations for plastic, glass, and other recyclable materials, promoting eco-friendly practices during the celebration.
    7. Clear Expectations: Clearly communicate cleanliness expectations to all guests through signage or announcements, fostering collective responsibility for maintaining a clean environment.

    These measures will collectively contribute to a pleasant and hygienic atmosphere during the Memorial Day celebration, ensuring a memorable experience for all attendees.

    Tips for quick clean-ups between activities

    When entertaining guests during Memorial Day events, quick clean-ups between activities can help maintain a tidy and enjoyable atmosphere. Implement these simple strategies to keep your home in top shape throughout the celebrations:

    1. Wipe down surfaces: Keep cleaning wipes or a spray bottle with a microfiber cloth handy to swiftly wipe down tables, countertops, and any other surfaces as needed.
    2. Assign tasks: Encourage family members and guests to take on small cleaning tasks during lulls in the festivities, such as gathering empty cups or disposing of trash.
    3. Utilize storage bins: Place labeled bins strategically around your home for easy organization of items like toys, outdoor games, or extra seating cushions.
    4. Spot vacuuming: Quickly run a handheld vacuum or portable sweeper over high-traffic carpeted areas to pick up crumbs and debris.
    5. Trash management: Empty overflowing trash cans and replace liners as necessary to prevent messes from accumulating.
    6. Utilize air fresheners: Keep your home smelling fresh by using air fresheners strategically placed throughout the space.

    Implementing these quick clean-up tips will ensure that you can enjoy a seamless Memorial Day gathering without feeling overwhelmed by the maintenance of your home environment.

    Post-Memorial Day Cleaning Tips

    After the festivities, focus on sprucing up outdoor areas and BBQ spaces to restore them to their pre-celebration state. Ensure waste is properly disposed of and any recyclable items are separated for environmentally-friendly cleanup.

    Clean and store party supplies, ensuring they’re ready for future gatherings while maintaining a tidy space post-celebration.

    Focus on outdoor spaces and BBQ areas

    To prepare outdoor spaces and BBQ areas for Memorial Day, house owners and parents in Tampa Bay can follow these practical steps:

    1. Clean and declutter the outdoor spaces, removing any debris or unnecessary items to create a welcoming environment for gatherings.
    2. Scrub and sanitize the BBQ grill to ensure it is ready for use, paying particular attention to grates, trays, and surfaces.
    3. Arrange comfortable seating and shaded areas for guests to relax and enjoy the festivities.
    4. Inspect outdoor lighting and replace any bulbs as necessary to create a warm ambiance during evening celebrations.
    5. Set up designated waste disposal stations with clearly marked bins for recycling and general waste to maintain cleanliness throughout the event.
    6. Enhance the atmosphere with festive decorations such as table centerpieces, outdoor lanterns, or themed banners to add a touch of holiday cheer.

    Properly dispose of waste and recycle

    House owners and parents can effectively manage waste after their Memorial Day celebrations by following these essential tips:

    1. Separate reusable items such as plastic bottles, aluminum cans, and glass containers from general waste to ensure they are properly recycled.
    2. Use designated recycling bins or contact local waste management services for information on the appropriate disposal of specific materials.
    3. Dispose of food waste in composting bins to reduce overall landfill contribution and create nutrient-rich soil for gardening.
    4. Bag non-recyclable items securely, ensuring that they are tied to prevent spillage or littering during waste collection and transportation.

    Proper waste management not only supports environmental sustainability but also contributes to a cleaner and healthier community for everyone in Tampa Bay.

    Clean and store party supplies

    After properly disposing of waste and recycling, another important task after a Memorial Day celebration is cleaning and storing party supplies. Here’s a guide on how to do this effectively:

    1. Gather all the party supplies such as utensils, plates, cups, and decorations.
    2. Clean the reusable items thoroughly using warm soapy water or following specific care instructions.
    3. Allow the items to air dry completely before storing them away to prevent mold or mildew growth.
    4. Sort and organize the supplies into designated storage containers or areas to keep them easily accessible for future use.
    5. Label the containers clearly to identify their contents and make locating them effortless for upcoming events or gatherings.

    By following these tips, house owners and parents can efficiently clean and store party supplies after the Memorial Day celebration in Tampa Bay.

    Local Memorial Day Cleaning Events in Tampa Bay

    Tampa Bay hosts various local Memorial Day cleaning events, including beach cleanup initiatives and park and community clean-up events. These activities provide an opportunity for residents to come together and contribute to a cleaner environment during the holiday celebrations.

    Read on for more details.

    Beach clean-up initiatives

    Beach clean-up initiatives provide an opportunity to give back to the community and protect the environment. House owners and parents can participate in organized efforts to keep Tampa Bay’s beaches pristine, ensuring a safe and enjoyable environment for families.

    1. Join Local Clean-Up Events: Keep an eye out for local organizations or city-sponsored beach clean-up events happening around Memorial Day weekend. By participating, families can actively contribute to maintaining the beauty of Tampa Bay’s beaches.
    2. Involve Kids in the Effort: Engage children in the importance of environmental conservation by involving them in beach clean-ups. This hands-on experience fosters a sense of responsibility towards nature while creating lasting memories for kids.
    3. Proper Waste Disposal: Emphasize the proper disposal of waste collected during the clean-up, ensuring that items are recycled or disposed of responsibly. Teaching kids about waste management aligns with sustainable living practices.
    4. Spread Awareness: After participating in beach clean-ups, share personal experiences on social media or within your community to encourage others to join future initiatives, thus amplifying the impact of these events.
    5. Support Conservation Organizations: Beyond individual efforts, consider supporting local conservation organizations focused on preserving Tampa Bay’s coastal areas through donations or volunteering opportunities.

    Park and community clean-up events

    Park and community clean-up events provide an excellent opportunity for house owners and parents to engage in community service while teaching their children the value of environmental stewardship. Participating in these events fosters a sense of pride in one’s neighborhood and teaches valuable lessons on sustainability.

    1. Engage with local community organizations hosting clean-up events to find opportunities for involvement.
    2. Encourage children to actively participate in the clean-up efforts, teaching them the importance of keeping public spaces clean and preserving nature for future generations.
    3. Ensure safety by wearing appropriate protective gear such as gloves and closed-toe shoes during the clean-up activity.
    4. Teach children about proper waste disposal by sorting recyclables from trash collected during the event.
    5. Take advantage of these events to connect with neighbors and other participants, fostering a sense of camaraderie within the community.
    6. Share insights about sustainability practices with fellow participants, contributing to a more environmentally conscious neighborhood.
    7. Document the experience through photos or journals, creating lasting memories and further reinforcing the value of environmental stewardship in children’s minds.

    Professional Cleaning Services for Memorial Day

    For a thorough and stress-free Memorial Day celebration, consider the benefits of hiring professional cleaning services, providing you with more time to focus on enjoying the festivities.

    Read more about it in our blog!

    Benefits of hiring cleaning services

    Hiring professional cleaning services for Memorial Day offers numerous benefits. It allows homeowners and parents to focus on preparing for the festivities without the added stress of deep cleaning.

    Professional cleaners bring expertise in addressing high-traffic areas, ensuring a pristine environment for gatherings. They use advanced equipment and eco-friendly products, providing a thorough clean that promotes a healthy living space.

    Outsourcing this task also saves time and energy, allowing families to fully enjoy their holiday weekend in Tampa Bay without worrying about extensive post-party cleanup.

    These services are particularly advantageous for busy households as they ensure that all areas, including outdoor spaces and BBQ areas, receive careful attention before and after celebrations.

    By engaging top-rated cleaning companies in Tampa Bay, families can rest assured knowing that their homes will be immaculate pre- and post-party while they create lasting memories during Memorial Day events.

    Top recommended cleaning companies in Tampa Bay

    Green Cleaning Pros: This company is recognized for their eco-friendly approach, using non-harmful products that are safe for families and pets. They offer thorough cleaning services for both indoor and outdoor spaces.

    Sunshine Maids: With a reputation for reliability and attention to detail, Sunshine Maids provides customizable cleaning plans to suit individual needs. Their professional team ensures every nook and cranny is immaculate.

    Sparkling Clean Solutions: This cleaning service excels in its exceptional customer satisfaction rating and prompt, efficient service. They specialize in pre-party and post-party cleanups, ensuring your home is prepared for any celebration.

    Tampa Bay Cleaning Solutions: This company offers comprehensive cleaning services with a focus on high-quality standards and careful attention to detail. Their experienced team can handle all aspects of pre-Memorial Day deep cleaning as well as post-event tidy-ups.

    Fresh Start Cleaning Co.: Known for their affordable rates and consistent results, Fresh Start Cleaning Co. provides a range of services from general housekeeping to specialized outdoor cleaning for patio areas and BBQ spaces.

    Conclusion

    After implementing the pre-party cleaning tips and maintaining cleanliness during Memorial Day events, house owners and parents in Tampa Bay can ensure a stress-free post-Memorial Day clean-up.

    Focusing on outdoor spaces, proper waste disposal, and professional cleaning services are essential for a successful conclusion to the holiday weekend. With these actionable steps, families can enjoy a memorable celebration without worrying about the aftermath of the event.

    It’s important for homeowners to prioritize clean-up efforts after the festivities to maintain a tidy environment. By following these tips, Tampa Bay residents can ease into their regular routines with minimal post-holiday hassle.

    Taking proactive measures will ensure that everyone is left with pleasant memories of this special occasion while keeping their homes clean and organized.

    FAQs

    1. What is the purpose of Memorial Day cleaning in Tampa Bay?

    Memorial Day cleaning in Tampa Bay helps prepare homes and outdoor spaces for summer gatherings. It ensures that areas are clean, safe, and welcoming for family and friends.

    2. What tasks should I include in my Memorial Day cleaning checklist?

    Your checklist should cover essential tasks like deep-cleaning floors, dusting surfaces, organizing clutter, washing windows, and tidying up outdoor spaces such as patios or gardens.

    3. How can I make Memorial Day cleaning easier?

    To simplify your cleaning process, break down tasks into smaller steps. Set a timer for each task to stay focused. Consider enlisting family members or friends to share the workload.

    4. Are there any common misconceptions about Memorial Day cleaning?

    Many people believe that spring cleaning is enough before summer arrives; however, regular maintenance throughout the year keeps your home in good shape and ready for seasonal events like Memorial Day gatherings.